Christmas crafts for adults can mean painting a tiny pink house, making a bracelet full of holiday charms, or giving a gingerbread cottage a candy roof. These ten projects have room for your own style, whether you're making something on your own or spending an afternoon with friends.
You'll find supplies and steps for every craft below. A few need drying time between stages, so check the prep notes before picking your project. Put on a Christmas playlist, clear a spot at the table, and bring out the ribbon.
1. Paint ornaments with tiny details
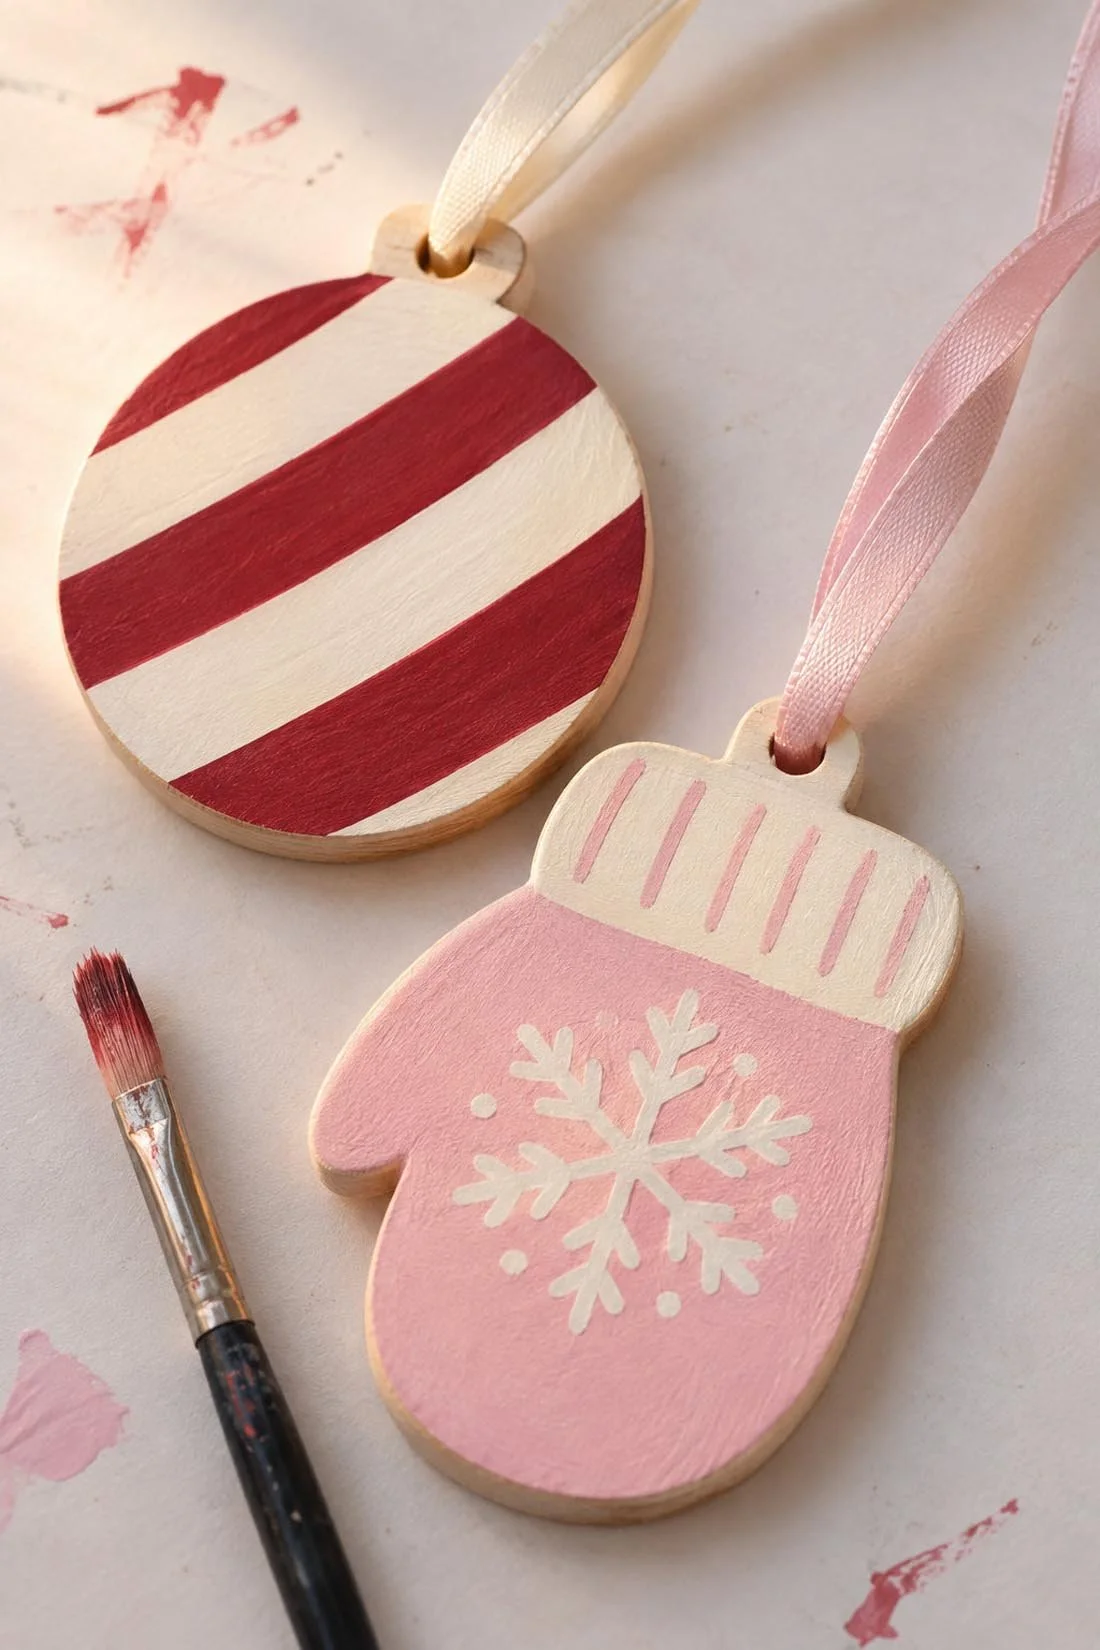
Painted ornaments give everyone the same starting point and a whole tree's worth of options. Try a striped bow, a little sweater, your pet's face, or a mug with marshmallows piled on top.
Supplies: Plain wooden ornaments or unglazed ceramic ornament blanks made for painting, acrylic paint, small brushes, a pencil, water cups, and ribbon.
How to make them: Cover the table, then sketch a design lightly on your ornament. Paint the background first and let it dry as the paint label directs. Add your stripes, dots, or tiny picture in a second layer. Once the paint is fully dry, thread ribbon through the hanging hole and knot the ends.
Choose a few colors to share across the table, such as cherry red, pale pink, and cream. Everyone can make something different while keeping the set loosely matched. A tiny croissant ornament beside a striped mitten would make a cute pair.
Prep note: Check whether your blanks need a base coat. Keep pieces flat while they dry, and use the paint maker's directions if you add a finish.
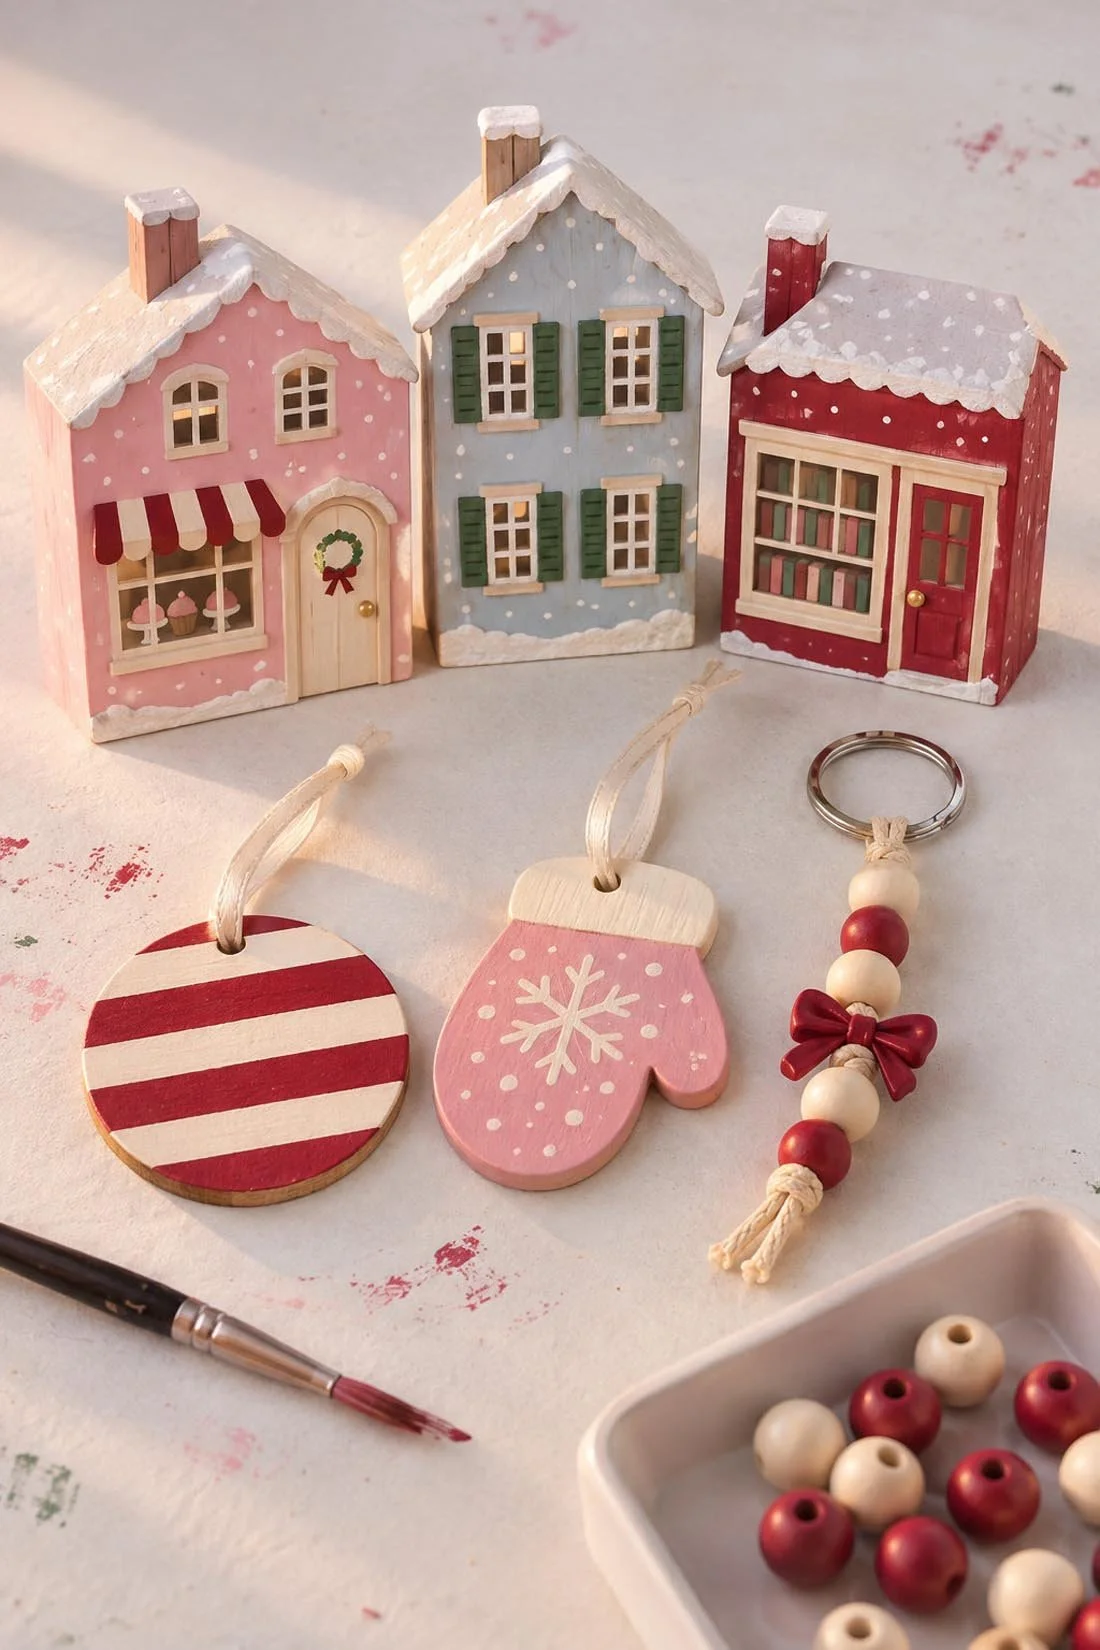
2. Paint a mini Christmas village
A row of little wooden houses makes a Christmas village you can build on year after year. Give each friend one house, then line them up for a group photo before everyone takes theirs home.
Supplies: Unfinished wooden craft houses, acrylic paint, brushes, a pencil, craft glue, ribbon scraps, and small decorative trees.
How to make it: Paint the walls and roof in separate colors. Once those layers dry, add windows, a door, and a small sign. Paint white dots along the roof for snow. Attach a ribbon bow or a tiny paper wreath with craft glue, following its drying directions.
You could make a red bookshop, a pale-blue bakery, or a pink house with green shutters. Put the buildings on a tray with little trees between them. The bakery can have the largest window. It has pastries to display.
Prep note: Choose houses that stand on their own. If you want light, use a house made for an LED light and follow its directions.
3. Make clay ornaments with stamped patterns
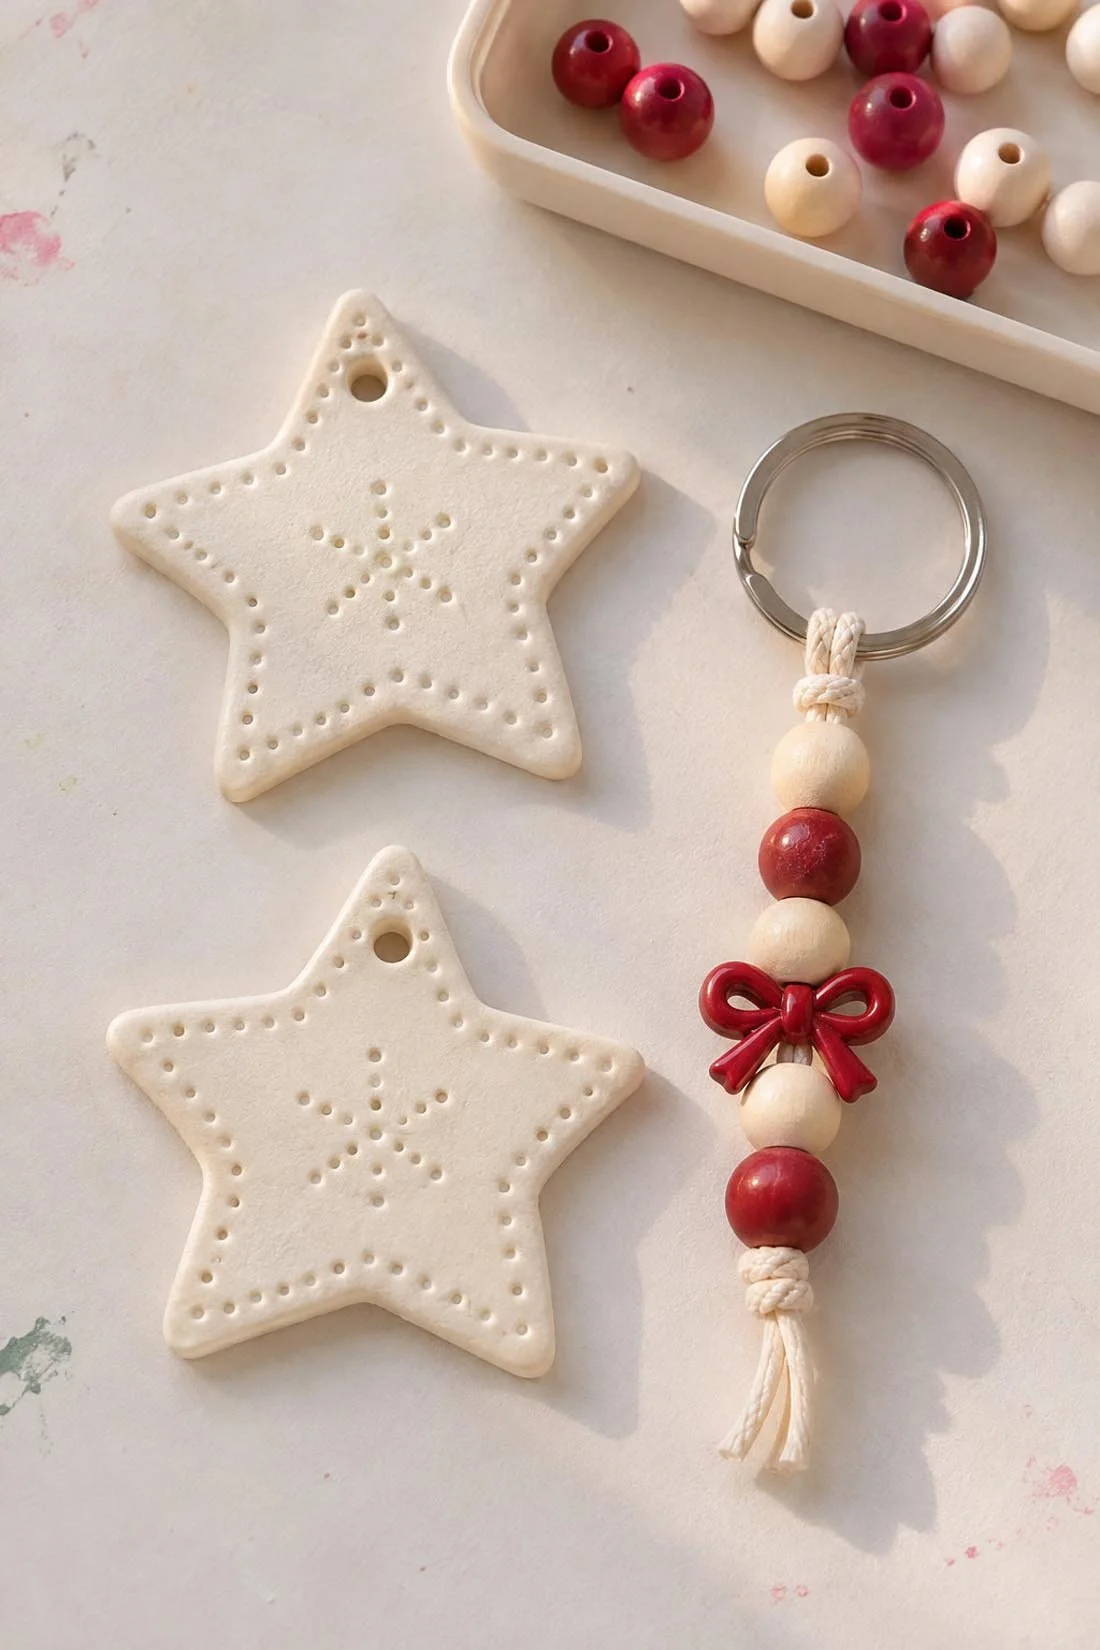
Air-dry clay works well for flat ornaments with names, small patterns, or a pressed sprig design. You can keep the clay's own color or paint it once it's fully dry.
Supplies: Air-dry clay, a rolling pin used for crafts, a protected work board, cookie cutters, a straw, letter stamps, and ribbon.
How to make them: Roll the clay to the thickness its maker recommends. Cut your shapes, then press in a name or pattern. Make a hanging hole near the top with the straw, leaving enough clay around it to hold the ribbon. Dry the pieces as the package directs before painting or hanging them.
Stars, hearts, and little houses all work. For a gift topper, stamp the person's first initial into a small circle and tie it onto the finished package.
Prep note: This is a project with a break between shaping and painting. For example, Crayola's air-dry clay guidance calls for 72 hours of drying before sealing. Its clay also stays indoors, even after sealing. Follow the directions for the clay you choose.
4. String Christmas charm bracelets or keychains
Beads and holiday charms let you make something you can wear or clip onto a bag. Pick a bracelet for a softer look or a keychain when you want a bigger bow or bell.
Supplies: Beads, holiday charms with closed loops, scissors, and either jewelry elastic or cord with a key ring. Choose beads with holes that fit your cord.
How to make them: Lay out your bead pattern before threading. For a bracelet, check the fit around your wrist, then secure the elastic as its maker directs. For a keychain, fold the cord through the ring and pull both ends through the loop. Thread beads onto the ends and tie secure stopper knots below them.
Try pearl-style beads with a red bow charm, green beads with a gold bell, or letter beads spelling a friend's name. Make a matching pair with different colors so each person gets their own version.
Prep note: Small bowls or a tray with a rim help keep beads in reach. Check that knots and charms stay secure before wearing or gifting the finished piece.
5. Make a small ribbon-and-greenery wreath

A small wreath gives greenery, bells, and ribbon their own little display. An embroidery hoop makes a useful base for an indoor wreath with decoration along one side.
Supplies: A wooden embroidery hoop, faux greenery sprigs, floral wire, wire cutters, ribbon, and small bells.
How to make it: Arrange the greenery along the lower curve of the hoop. Wrap the stems onto the hoop with floral wire, keeping the wraps close together. Tuck the wire ends inward and cover them with another sprig. Tie ribbon over the meeting point, then add a bell with a short piece of ribbon.
Leave the upper part of the hoop bare for an open look. A wide velvet bow makes a pretty finish, especially if its tails hang below the greenery.
Prep note: Choose light decorations and a hook suited to the wreath's weight. Keep your finished wreath indoors unless every material is made for outdoor use.
6. Decorate gingerbread houses in teams
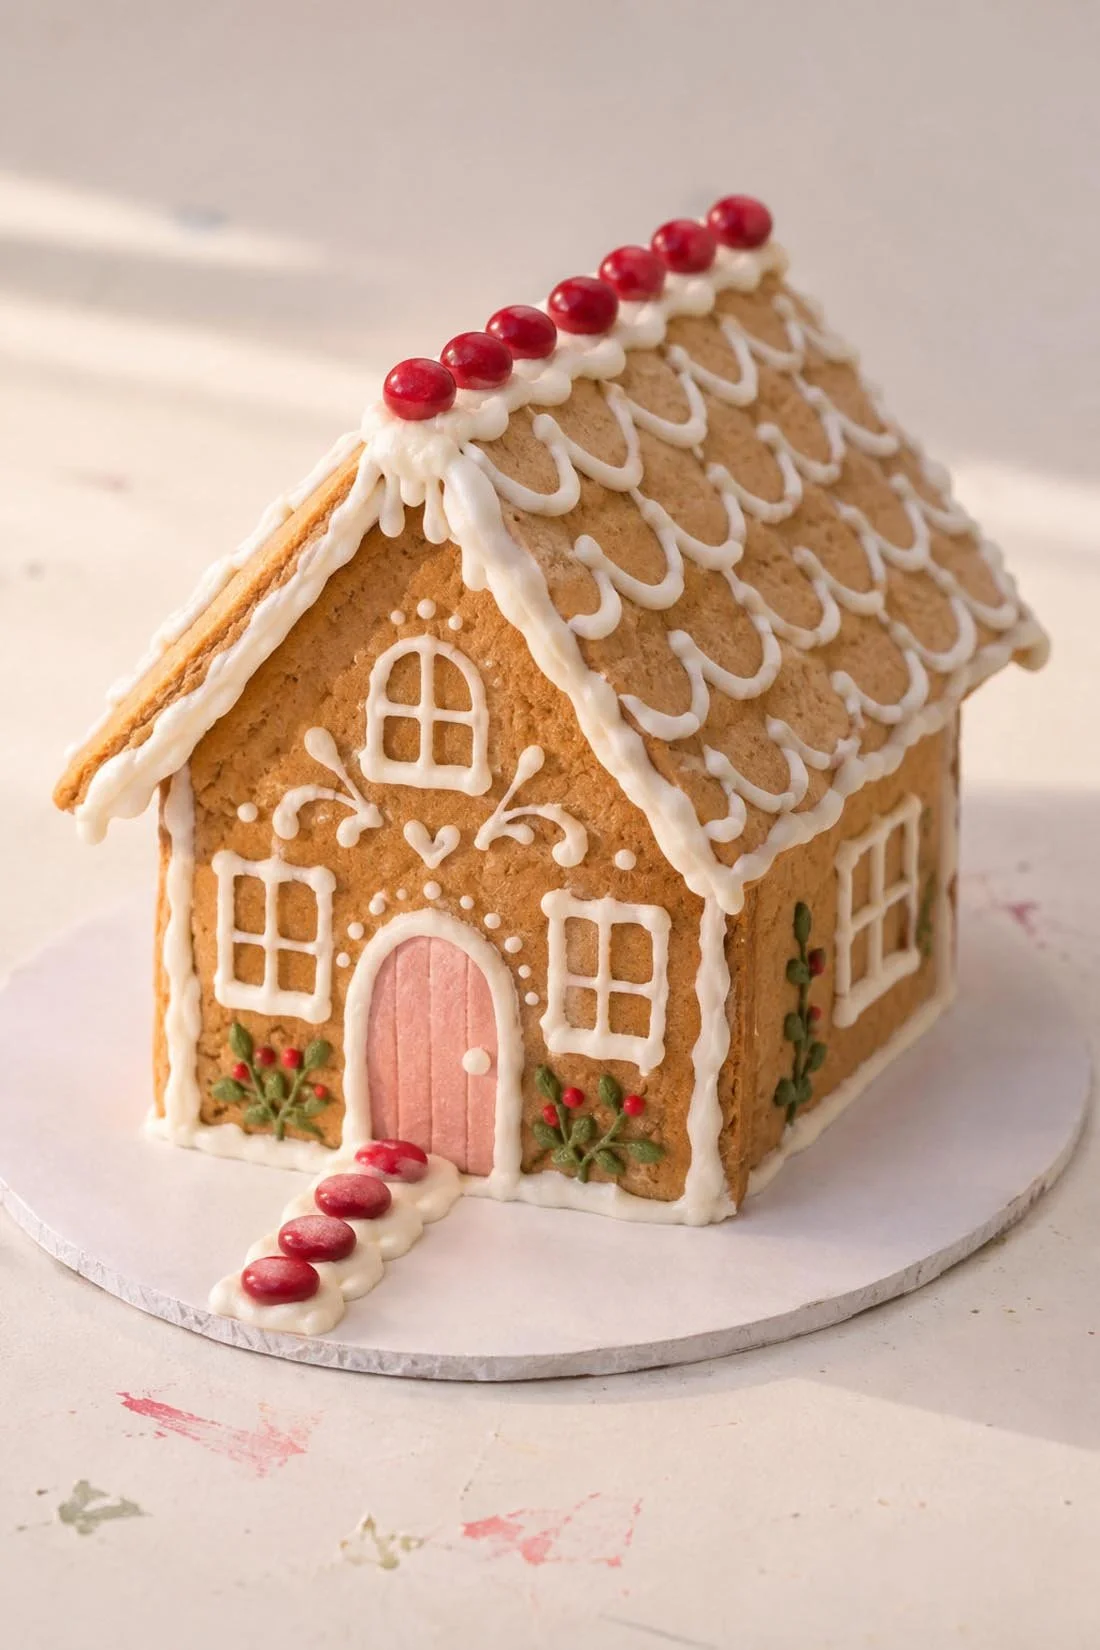
A gingerbread house contest turns the craft table into a tiny candy neighborhood. Give each team a house and choose categories such as best candy roof, coziest cottage, or most colorful front door.
Supplies: Gingerbread house kits, icing made for assembly, piping bags, candy, sprinkles, and a sturdy board for each house.
How to make them: Assemble the houses as the kit directs and give the icing time to set before adding decorations. Pipe icing onto the areas you want to cover, then add candy a little at a time. Finish with a path, a tree, or a sprinkle-covered yard.
For a decorating-only gathering, build the houses ahead. King Arthur Baking's gingerbread house guide covers construction and icing. Keep ingredients and tools food-safe if anyone plans to eat their house.
Prep note: Check food allergies before choosing candy. If you're setting out snacks too, these cookie recipes for a baking afternoon give you something to share while the houses set.
7. Fold paper stars and cut snowflakes
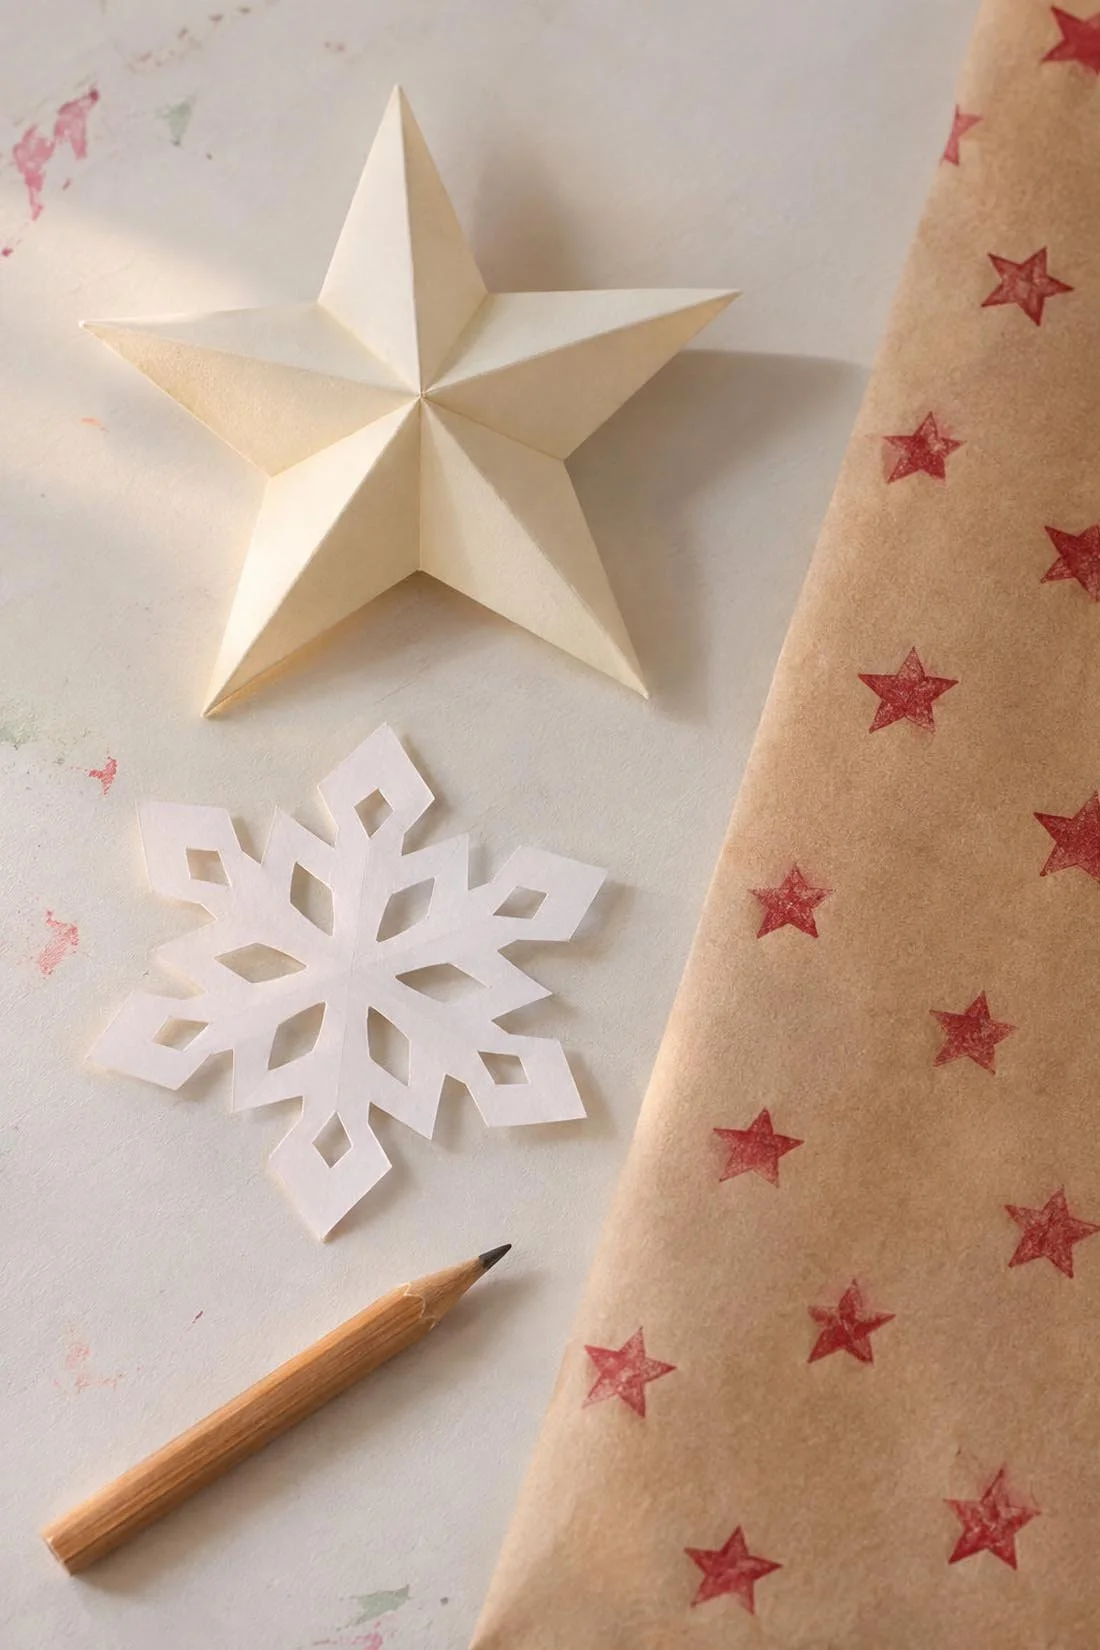
Paper stars and snowflakes make a pretty display with paper you may already have. Use one color for a matching set or mix wrapping-paper scraps with plain white sheets.
Supplies: Lightweight paper, scissors, a pencil, a ruler, a hole punch, glue, and thread.
How to make a folded star: Draw and cut out a five-point star. On the back, mark its center. Use the ruler to draw a line from each tip to the center, then another from each inner corner to the center. Fold gently along the lines, raising the tips and pressing the inner corners down to give the star shape. Add a thread loop through a small hole near one tip.
For a six-point snowflake, fold a square of paper diagonally into a triangle, then fold it in half again. Fold the smaller triangle into thirds so its sides overlap. Trim the uneven ends. Cut small shapes from the edges while leaving some of the folded edges joined. Unfold it slowly to see the pattern.
Prep note: Thin paper is easier to fold than thick card. Keep paper decorations away from heat and open flames.
8. String a dried orange garland
Dried orange slices look lovely with wooden beads, ribbon, and cinnamon sticks. Make a short strand for a shelf or use single slices as gift toppers.
Supplies: Fully dried orange slices, twine, a blunt tapestry needle, wooden beads with large holes, scissors, and optional cinnamon sticks.
How to make it: Start with slices that are fully dry and cool. Thread the twine through a slice near its rind, then add a wooden bead. Repeat until the strand is the length you want. Use knots to space the pieces and tie a loop at each end. Attach cinnamon sticks with separate lengths of twine.
For the drying stage, use House & Home's dried orange garland tutorial. You can also buy dried slices and begin with the stringing part.
Prep note: Dry the fruit ahead of a group craft session. Store the finished garland only when it's fully dry, and discard any slices that develop mold.
9. Stitch little felt ornaments
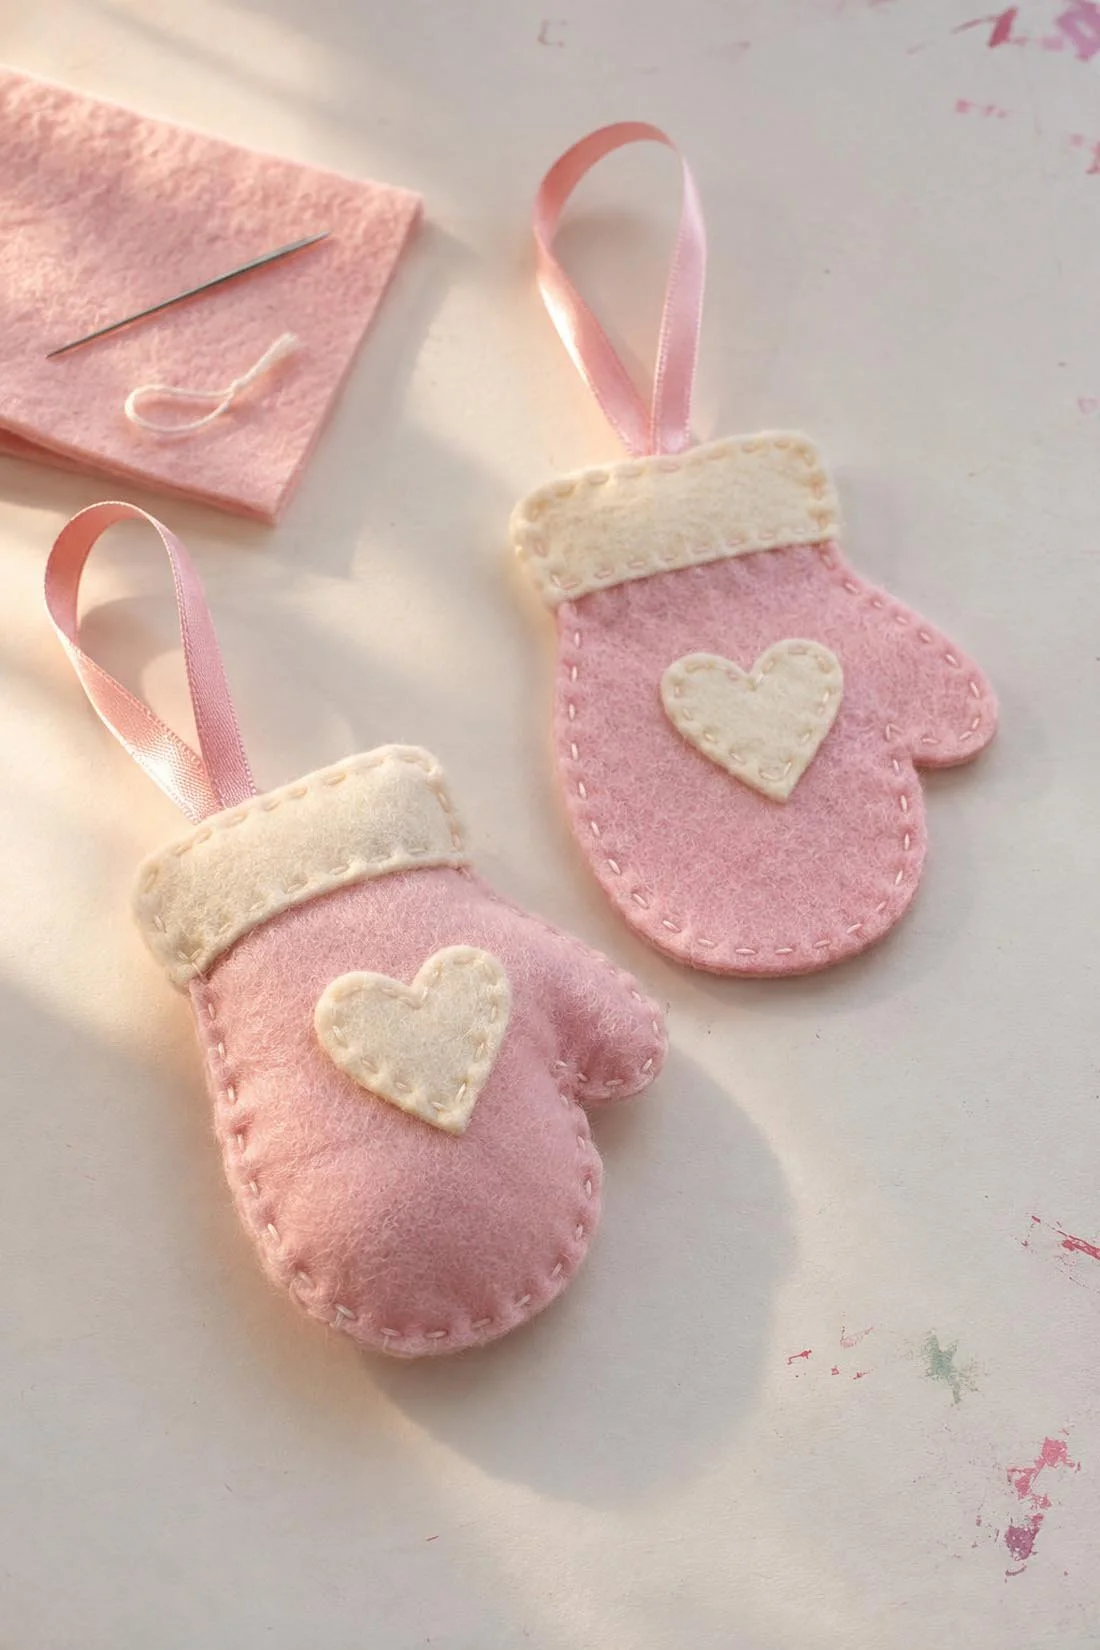
Felt ornaments are a good choice when you'd like a project with small details to add as you go. Make a mitten, a stocking, or a tiny sweater with a ribbon hanging loop.
Supplies: Craft felt, paper for a pattern, scissors, an embroidery needle, embroidery thread, ribbon, and optional stuffing.
How to make them: Draw a shape on paper and cut it out. Trace it twice onto felt, then cut both pieces. Add any stitched details to the front piece first. Place the two pieces together, tuck a folded ribbon between them at the top, and stitch around the edge. If you're adding stuffing, leave a gap, fill lightly, then close it.
Small straight stitches work for a first ornament. Add a cuff in another color or stitch a few dots across a sweater. A whole collection of miniature knitwear is a cute use of felt.
Prep note: For a flat ornament, skip the stuffing. If you enjoy making things through the year, these seasonal crafts for your room offer more projects to try.
10. Stamp your own gift wrap and tags
Hand-stamped wrapping paper turns plain paper into part of the gift. Repeat one small design, such as a star or a bow, and make a matching tag from cardstock.
Supplies: Plain wrapping paper, cardstock, ready-made stamps or foam shapes, a stamp pad or craft paint, scissors, a hole punch, and ribbon.
How to make it: Test the stamp on scrap paper first. Spread the wrapping paper flat and stamp one row, leaving room between prints. Add more rows, then let the ink or paint dry fully before wrapping. Stamp the same shape onto a tag, punch a hole, and add ribbon.
Try red stars on brown paper, green trees on cream, or tiny pink bows with red ribbon. Write the name on the tag after the print dries.
Prep note: For a group, cut paper into manageable sheets before people arrive. This project also fits a Christmas tradition to share with friends, especially when everyone brings gifts they already planned to wrap.
Choose a project for the time you have
For a single sitting, start with charm keychains, paper decorations, or stamped gift wrap. For a project you can return to, choose clay ornaments or a painted village. Drying time belongs in the plan, even when your part with the paintbrush is finished.
You can make all ten over the season or pick one for your next afternoon together. Our first choice would be the little village. That pink bakery needs neighbors.
You might also like
Christmas desk decorations that leave work space
Christmas movies for a nostalgic night in