Chocolate mint cookies, pumpkin sugar cookies, hot cocoa cookies and peppermint meltaways give you four different ways to spend a baking afternoon. One has a pale green frosting layer and a chocolate top. One leaves room for curved buttercream ridges. The third hides a marshmallow under its chocolate cap. The fourth has white peppermint icing and crushed candy canes. Pick the one you most want to make, then plan around that recipe's baking and finishing steps.
Ashley Fehr, Sally McKenney and Emily of Foodie Fiber created the recipes linked below. Their original pages have the full ingredients, methods and storage notes. This roundup helps you choose a batch and make room for the parts that happen after the oven timer rings. A cookie with frosting has a little more on its afternoon schedule.
Choose a cookie by the finishing step
Choose chocolate mint if you want frosting and a chocolate top, pumpkin sugar cookies if you want to shape and decorate, or hot cocoa cookies if you want a marshmallow layer. Peppermint meltaways add white icing and crushed candy canes. All four have a finish to add after the baked base. The difference is what you'd like to spend that part of the afternoon doing.
Think about the tools you enjoy using. A cookie cutter and a frosting bag suit one kind of baking day. Spreading a mint layer and adding chocolate suit another. You can have a lovely plate with any of these, so choose the project before choosing the plate.
You can also choose by the part you'd like to share with a friend. One person might love decorating, while another wants to help mix the dough and stay for the finished cookies. Say which parts you plan to do together. That gives your friend a clear picture of the afternoon before they arrive.
Start with one recipe when you want a smaller project. If you choose two, write down which tools and fridge spaces both recipes need. Two recipes with the same bowl or cooling spot need a turn each. A second batch is most fun when it has somewhere to go.
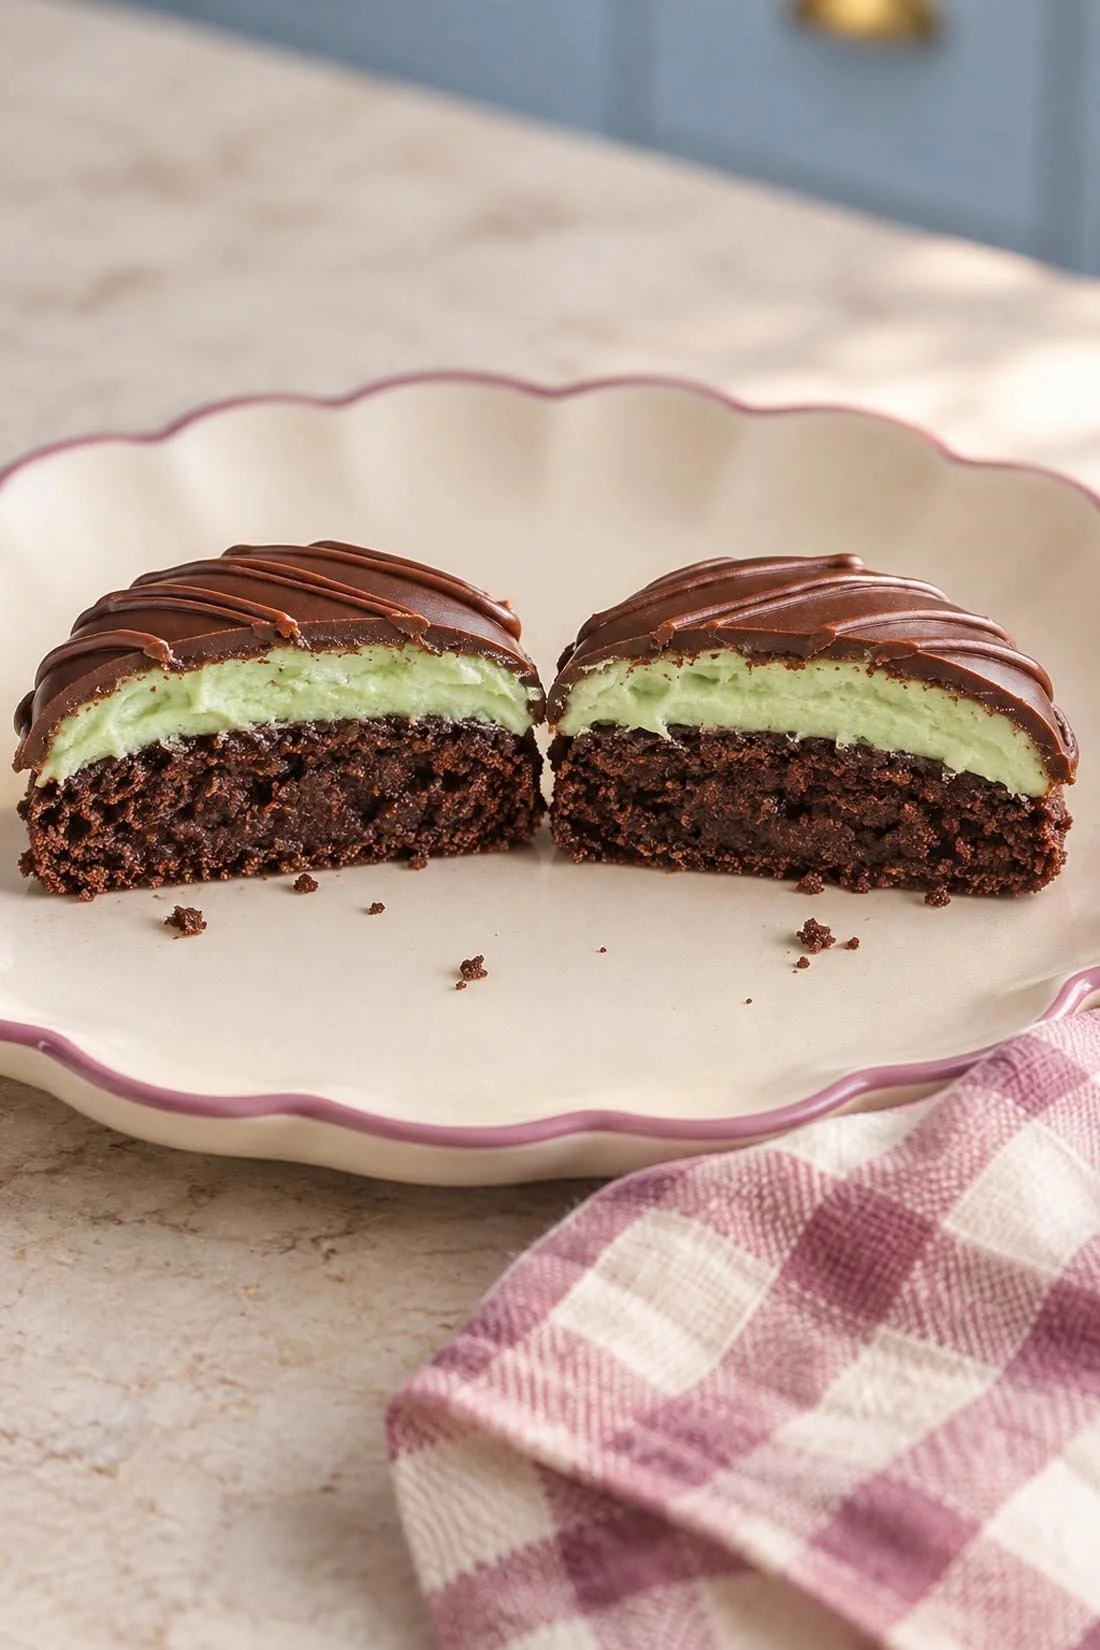
Chocolate mint cookies with a pale green frosting layer
Ashley Fehr's chocolate mint cookies at The Recipe Rebel pair a chewy cocoa base with mint frosting and a thin chocolate topping. The green food coloring is optional. The layers give you a clear choice if you like chocolate and mint together.
Her recipe lists 30 minutes of prep, 10 minutes of baking and an hour of cooling. Leave space for the frosting and chocolate stages when you plan your afternoon. Keep her full method open as you work, including the chilling step before the chocolate goes on.
These are single cookies with layers on top. A cut cookie shows the dark base, mint frosting and chocolate cap. A low stack lets the green edges show on the serving plate, too.
Get Ashley Fehr's full Chocolate Mint Cookies recipe at The Recipe Rebel.
Pumpkin sugar cookies with spiced buttercream
Sally McKenney's pumpkin sugar cookies at Sally's Baking are the pick for a cutout-and-decorating afternoon. Her recipe includes pumpkin in the dough and spiced buttercream on top. Read her notes about blotting the pumpkin and chilling the rolled dough before you choose a start time.
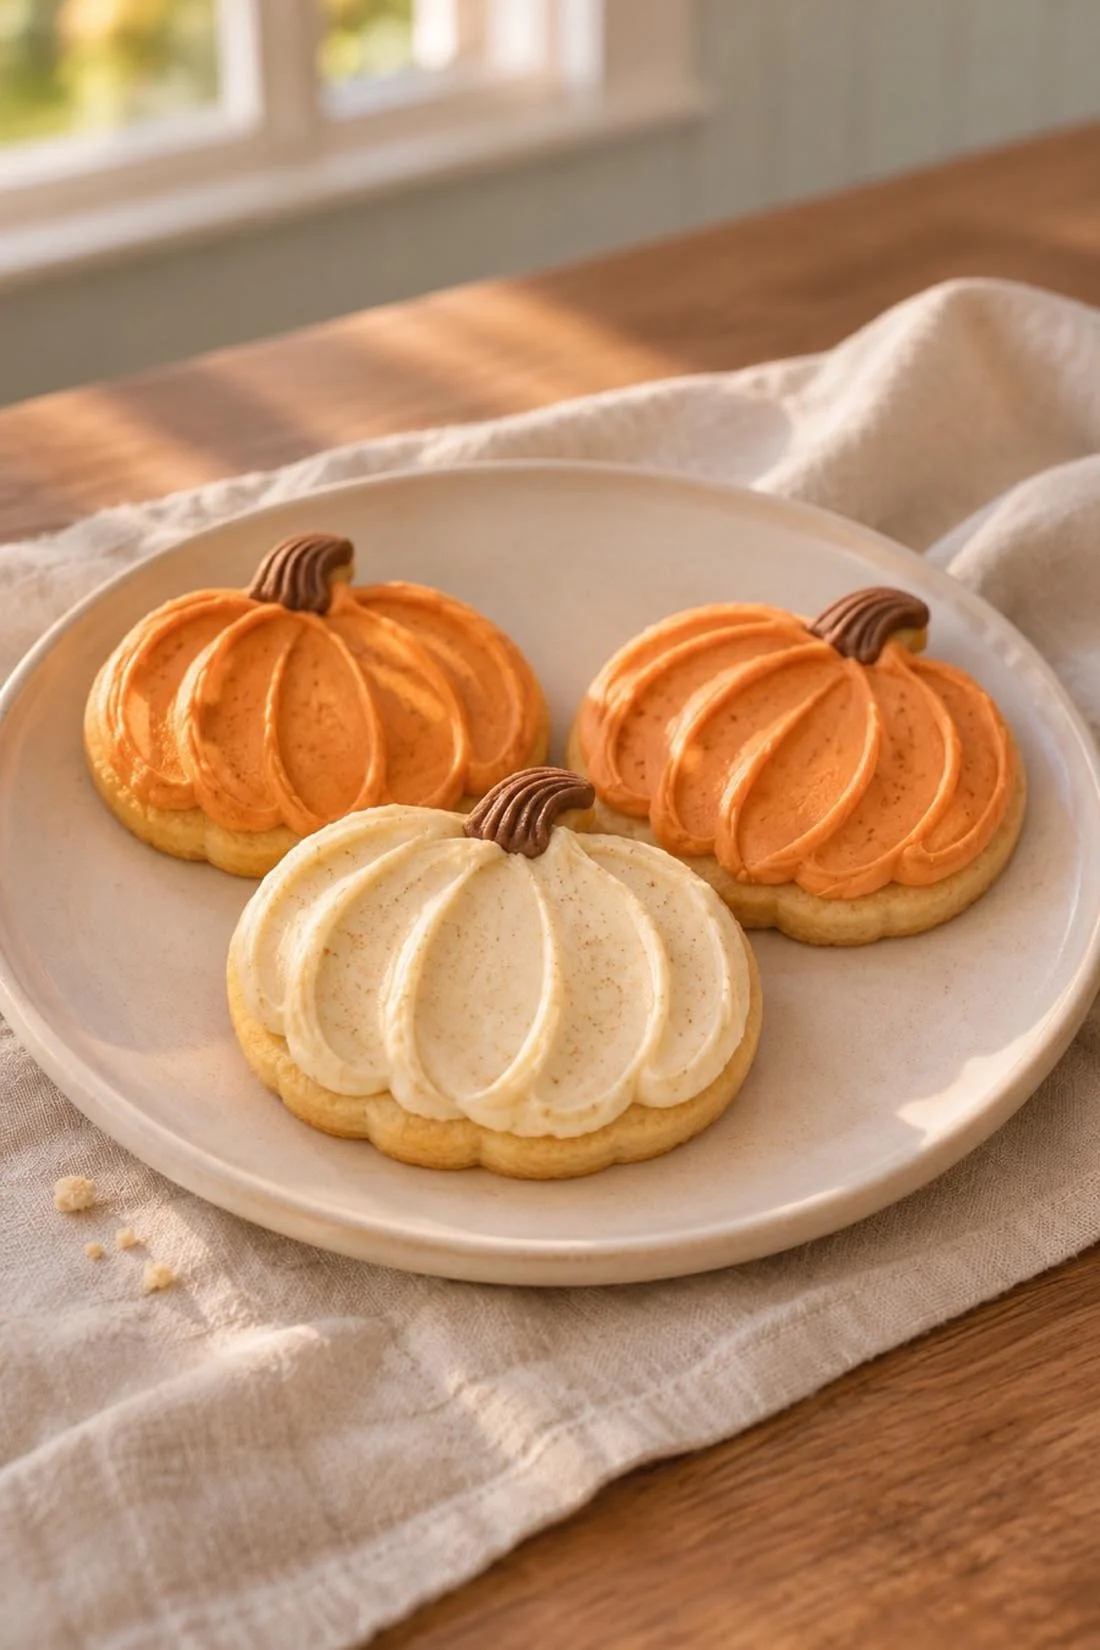
Our pumpkin sugar cookie decorating feature shows orange and ivory finishes, curved frosting ridges and small brown stems. You can choose one color or mix the two on a cream plate. The pumpkin shape gives the frosting a clear outline to follow.
Choose this batch when decorating is part of the plan. Set aside time for that stage, rather than fitting it into the last few minutes before you leave.
Get Sally McKenney's full Pumpkin Sugar Cookies with Spiced Buttercream recipe.
Hot cocoa cookies with a marshmallow middle
Sally McKenney's marshmallow-surprise hot cocoa cookies at Sally's Baking have a cocoa base, a marshmallow half and a chocolate finish. Her method includes at least two hours of dough chilling, so check the full timeline before inviting someone over to bake.
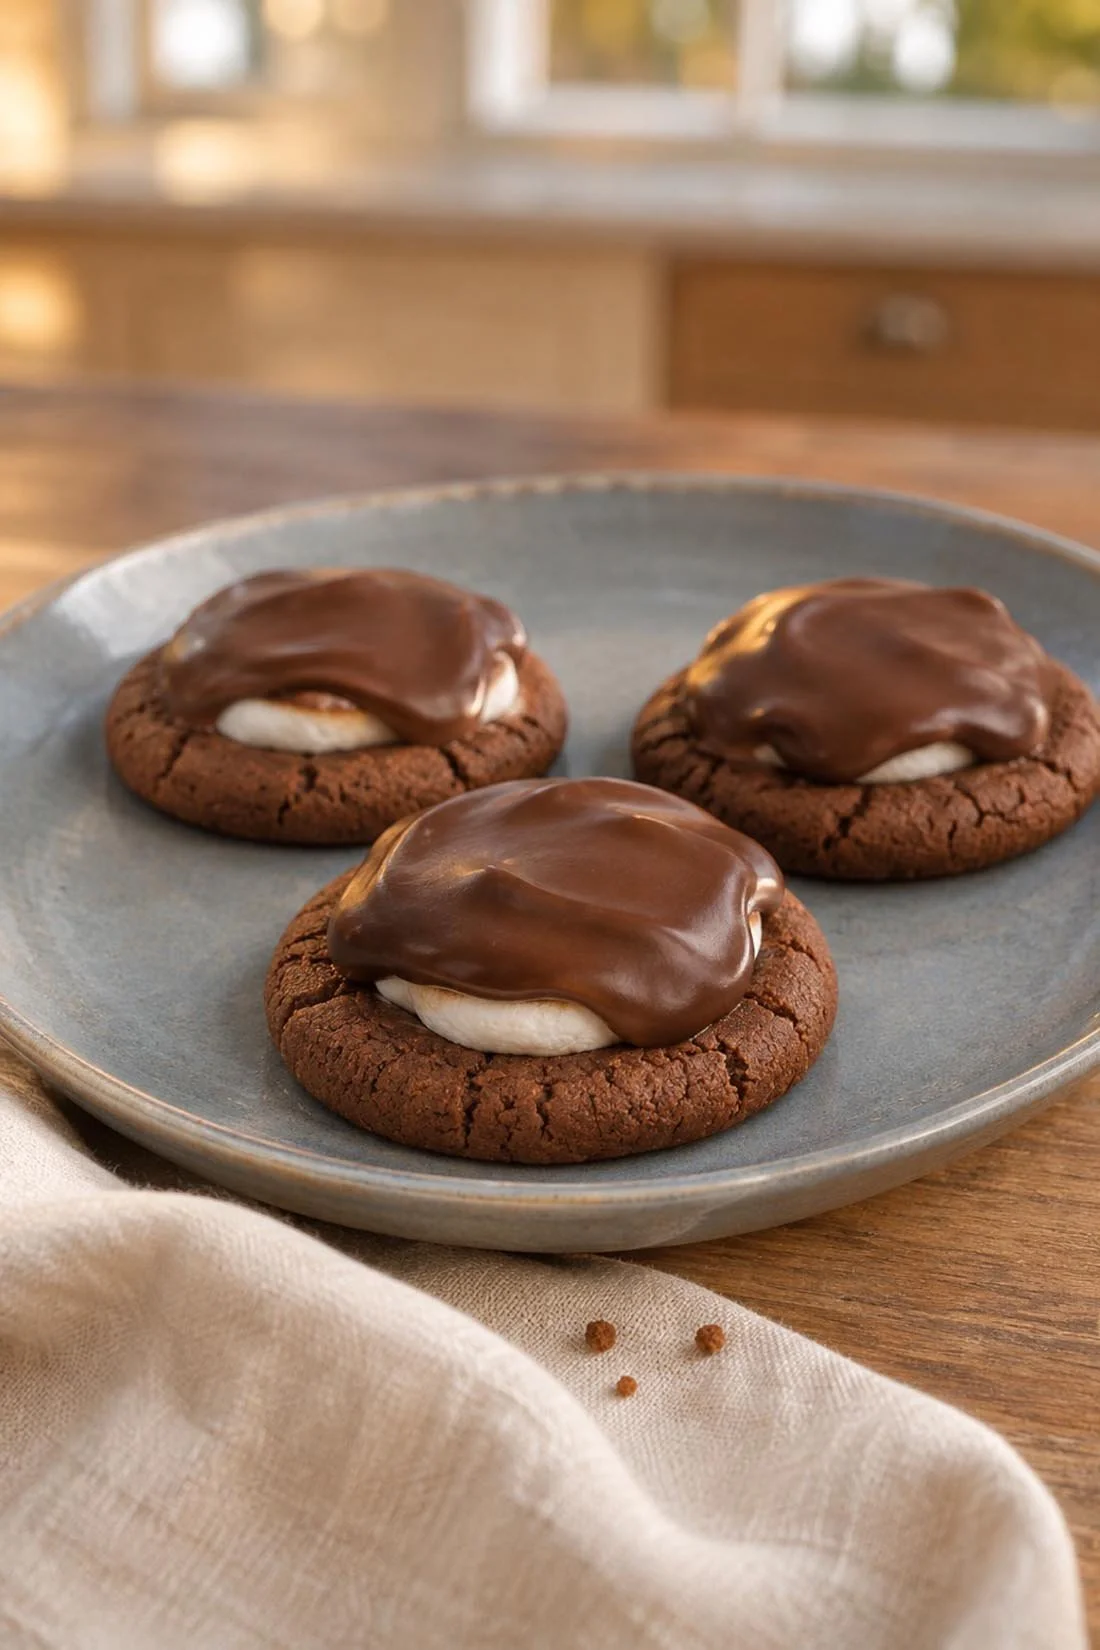
Our hot cocoa cookie feature shows the chocolate-covered top and the white marshmallow layer beneath it. This is a useful choice when you want the finish to come from chocolate rather than a piped pattern.
Read Sally's notes for the chocolate choice and storage. Keep the recipe link with your baking plans so you can return to those details when the cookies are finished.
Get Sally McKenney's full Marshmallow-Surprise Hot Cocoa Cookies recipe.
Peppermint meltaway cookies with icing and candy crunch
Emily of Foodie Fiber’s peppermint meltaway cookies have a pale, buttery base, white peppermint icing and crushed candy canes. Choose these when you want mint without chocolate. The red-and-white candy gives the tops a little crunch and a holiday finish.
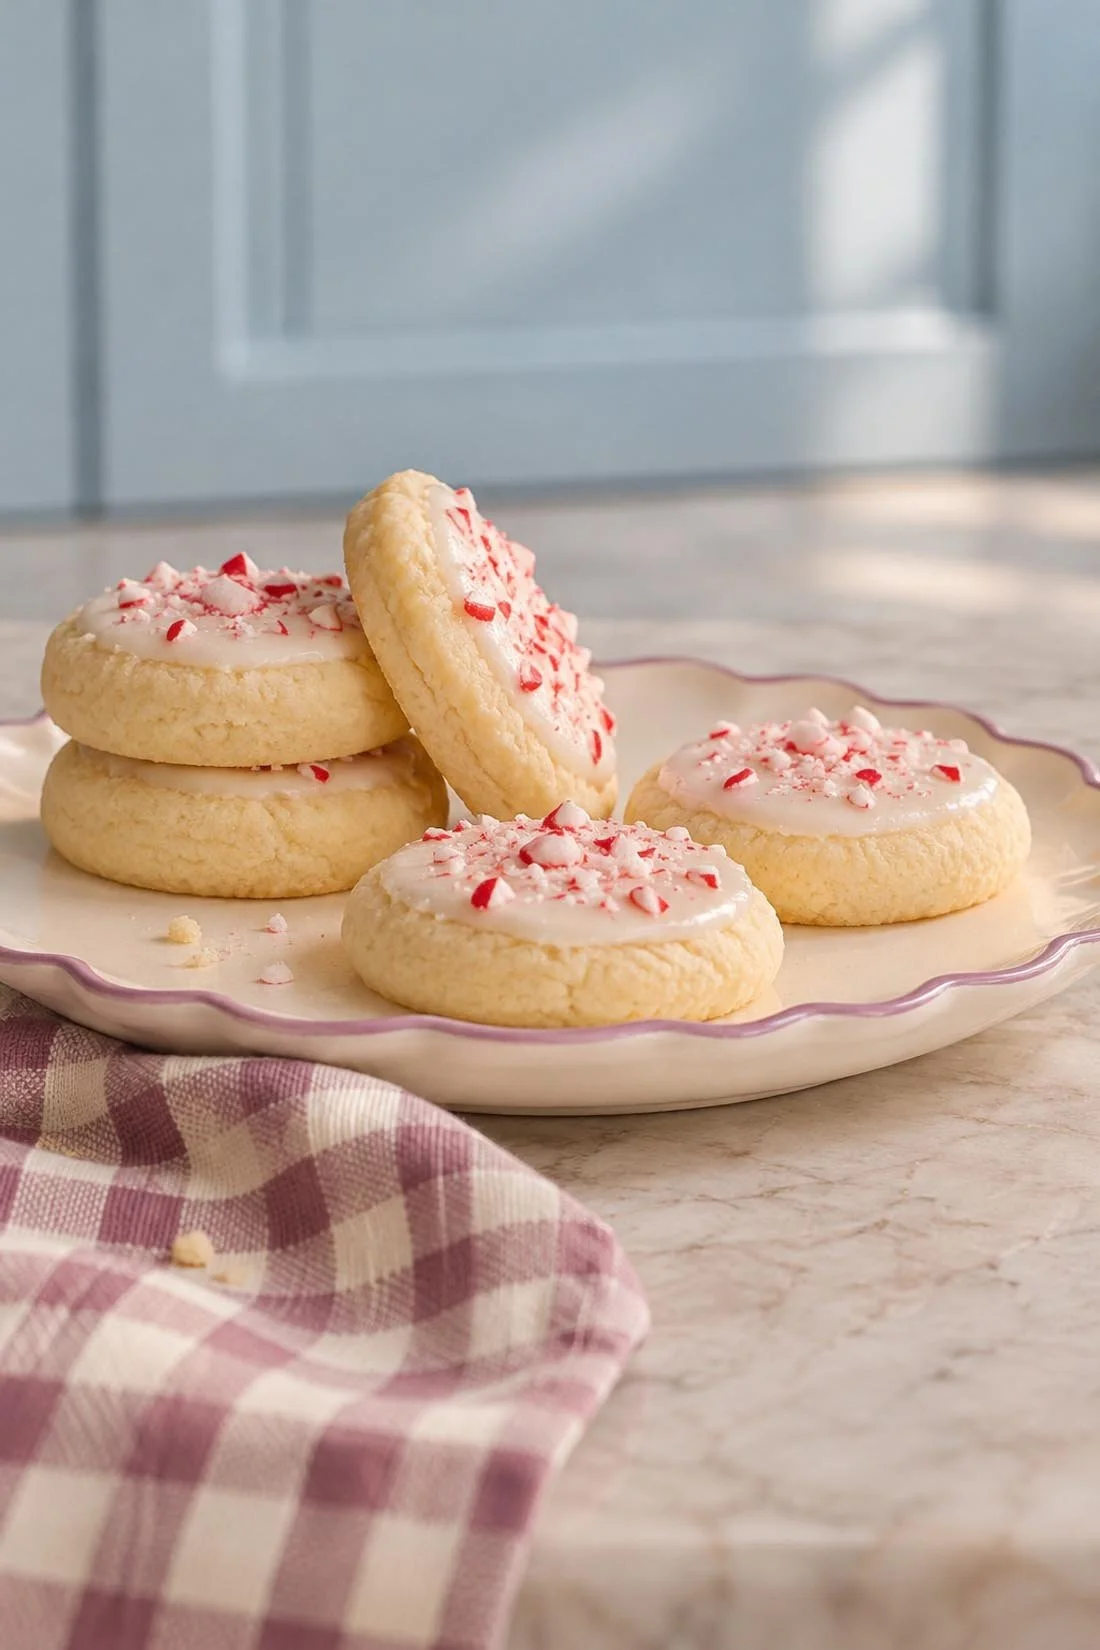
Her recipe makes 32 cookies and includes 30 to 45 minutes of dough chilling. After the cookies cool, leave another 20 to 30 minutes for the icing to set. That makes these a good pick for an afternoon with a few breaks between stages.
Get Emily’s full Peppermint Meltaway Cookies recipe at Foodie Fiber.
Plan backward from when you want to share them
Choose the time you'd like the finished cookies to be ready, then read the full recipe backward from that point. Cooling, chilling and adding a topping are part of the plan. The baking time tells you only how long a batch spends in the oven.
Write down three points: when you'll begin, when you expect to finish baking, and when the recipe says the cookies can be finished or packed. Use the developer's timing rather than a guess based on another cookie. If the recipe offers a make-ahead option, read that part before moving any stage to a different day.
For a visit with friends, decide whether the visit starts with mixing or with decorating. Both can be fun. A decorating visit may suit a day when you want more time around the table. A start-to-finish bake may suit an afternoon you've kept open for the whole project.
Keep the invitation clear about what you'll make together. You can send the original recipe link with it and ask your friend to check what they already have. One shared shopping note helps you see the missing items before anyone buys them. Add tools to that note when you plan to borrow a cutter, bowl or baking sheet.
If your friend is bringing something home, ask them to bring a container. Choose its size with the finished cookie in mind. A tall frosting layer needs a little room above it, and a small box may hold fewer finished cookies than plain baked rounds.
Give each part of the recipe a place to sit
Keep one clear space for mixing, another for cooling, and a third for the finish when your kitchen allows it. Those spaces can be small. What matters is knowing where the next tray or bowl will go before you're holding it.
Look at the kitchen you actually have. You might use one counter in stages, moving the mixing tools away before bringing out the frosting bowl. You might keep the serving plate on a nearby table until the food is ready. Let the plan fit the room and leave the sink usable.
Check your tools against the chosen recipe before you begin. A cutter, a cooling rack and a bowl each have their own job. If you need to borrow one, arrange that before the baking day. A tool named in one recipe may have no role in another, so keep the list tied to your chosen batch.
For a shared kitchen, tell the people who use it which space you'll need. Leave a place for someone to set down a glass or prepare their own food. You can make a baking afternoon feel welcoming without taking over every surface.
Bring out the serving towel and plate when you're ready for them. That keeps them separate from the mixing area and gives you a small final step to look forward to. Cream dishes and a checked towel work well for a batch on an ordinary afternoon.
Pick the plate after you pick the recipe
Let the cookie shape and finish guide the plate. Mint frosting shows clearly against cream, while orange and ivory pumpkins can share a wider plate. Chocolate-covered cocoa cookies have a rounded top that looks good in a low group.
Set out a few finished cookies first, then see how much space remains. You can keep the rest in the storage setup the recipe calls for and refill the plate later. The first serving doesn't need to hold the whole batch.
For a photo, choose a low view when you want to show a frosting band. A closer view of a cut cookie helps show the layers. Give the pieces firm support on the plate, and keep the food's actual shape in view. The photograph can show the small things that made you choose the recipe.
If you're packing cookies for someone else, keep the recipe name and direct link with the box. Let them read the full ingredient and storage notes from the creator. Ask about food needs before you choose the recipe, then keep any ingredient questions tied to that original page.
Make one batch part of the afternoon
Choose something you'd enjoy while the recipe has a waiting stage. You could bring out a puzzle, pick an album or sit down with a warm drink. Keep the next recipe step in mind when choosing what to do, especially if you'll need the kitchen again soon.
You can leave the rest of the afternoon open. One batch, a favorite plate and someone to share it with make a complete plan. Choose the mint layers, pumpkin ridges, marshmallow middle or peppermint icing, and save the other three recipe links for another baking day.