3 Whimsical Halloween Crafts for a Night with Friends
These whimsical Halloween crafts turn paper, string, and a few shared tools into friendly ghosts and little pumpkins. You can make a ghost garland, folded paper pumpkins, or gift tags with the friends around your table.
Choose one project for the night, or set out the supplies and let everyone choose. One person may spend the whole evening giving a ghost the right eyebrows. There is a place for that level of detail here.
Each project below has its own sizes and steps. Use the colors you already have, and leave any glued pieces to dry according to your glue's directions.
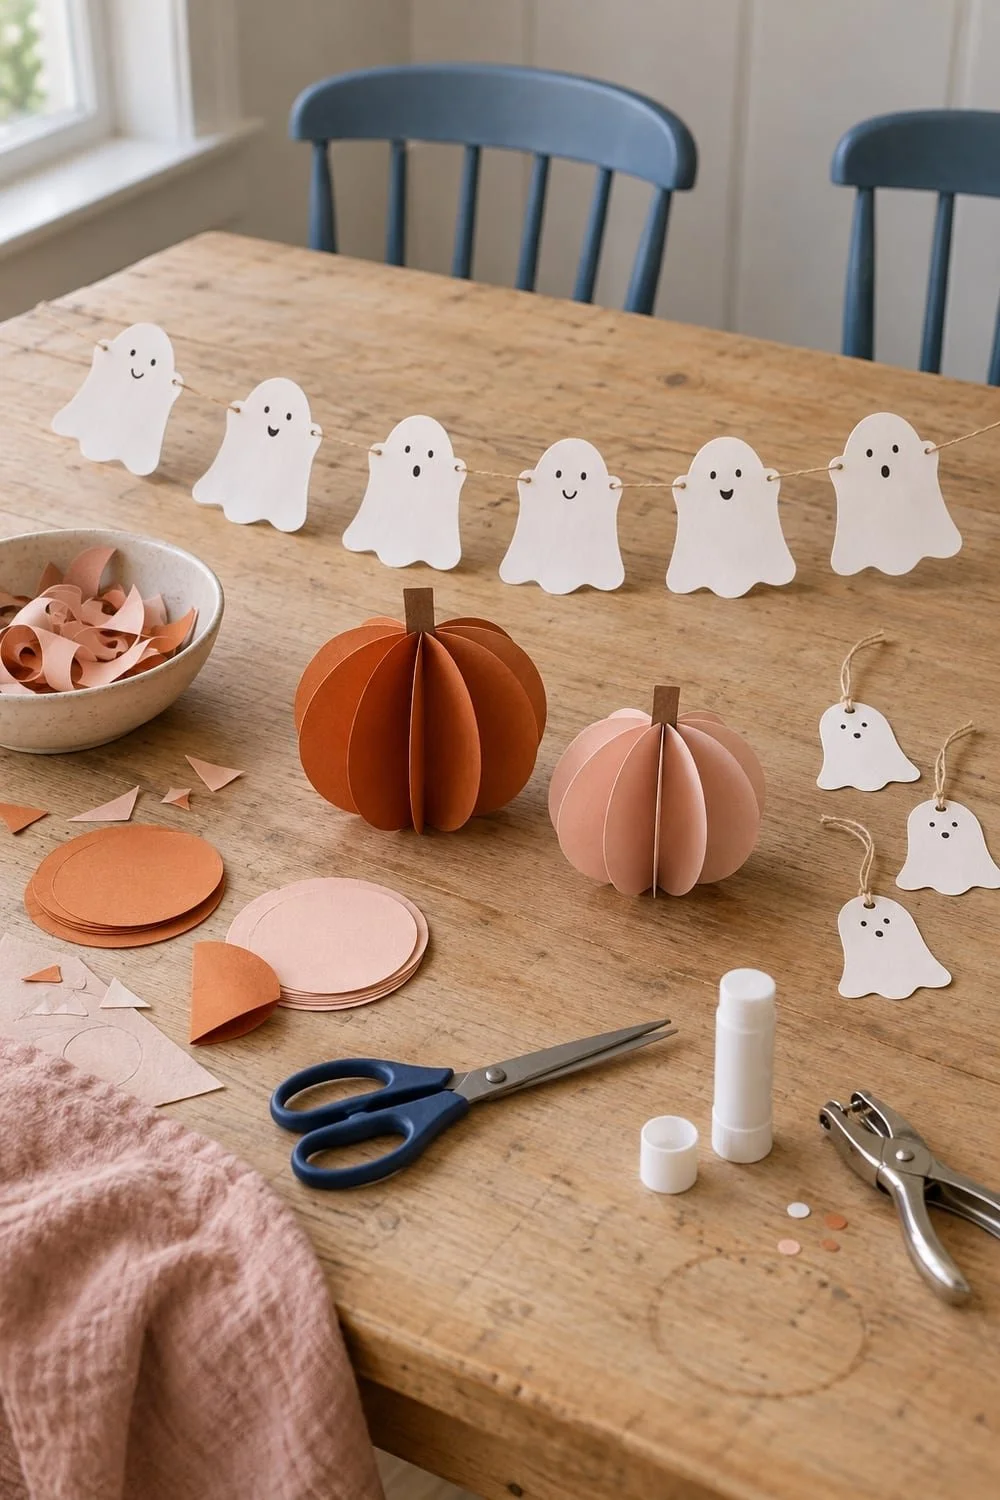
Set out a paper-craft table for friends
For a group of four, gather white paper or light card, a few sheets of colored paper, pencils, a dark marker, scissors, a hole punch, string, and paper glue. Add scrap paper to test faces and shapes. Check your supply amounts once everyone chooses a project.
Put scissors and the hole punch where people can pass them across the table. Give each person a clear work area and protect the surface from glue. A shallow tray or spare sheet can hold finished pieces while they dry.
Place snacks and drinks on another surface. Keep scraps in one bowl or bag so they stay out of the glue. You can save larger offcuts for the gift tags later.
The projects use shapes you draw yourself. You can sketch several versions on scrap paper before choosing one to trace. For other materials you may already own, our recycled-material craft ideas offer a different set of projects.
Make a friendly paper ghost garland
For a small garland, start with six pieces of white paper or light card, each about 4 by 6 inches. Use around 4 feet of string, a pencil, scissors, a dark marker, and a hole punch. You can make more ghosts or change the string length to fit your display spot.
Draw and cut the ghosts
On one piece, draw a rounded head that opens into a wider body with two small arms. Add a wavy lower edge. Keep the arms broad enough to leave space for a hole without tearing the paper.
Cut around the shape. Use that first ghost as a guide for the others, or draw each one a little differently. Keep the pieces separate rather than trying to cut a thick stack with small scissors.
Draw eyes and a mouth on each ghost. You can add a bow, rosy cheeks, or a tiny paper hat. If you glue on paper details, let them dry before threading the garland.
Thread and space the pieces
Punch one hole near each upper side of a ghost, keeping space between the hole and the paper edge. Thread the string through the two holes so the ghost hangs facing forward. Repeat for the other pieces.
Space the ghosts along the string and adjust their positions before hanging. A small loose knot beside a piece can help it stay in place. Keep the end loops long enough for the display method your room allows.
For a different construction, Aunt Annie's ghost garland tutorial shows a connected paper-chain version. Choose one method for your own garland; its fold-and-cut pattern works differently from these separate hanging pieces.
Build a folded-circle paper pumpkin
For one small pumpkin, use six paper circles of the same size, about 4 inches across. You also need paper glue and a small piece of brown or green paper for the stem. Orange, blush, or patterned scrap paper can each give it a different look.
To trace matching circles, use a round household object on a protected surface. Keep food and drinks away while you work. Cut the circles out and check that their edges are close in size.
Fold and join the circles
Fold each circle in half. If your paper has a pattern on one side, fold with the pattern inside so it will show on the finished pumpkin's panels.
Put a thin layer of paper glue on one outside half of a folded circle. Press the outside half of a second folded circle against it, lining up the straight folds and curved edges. Keep adding folded circles to form a stack, with one unglued outside face at each end.
Before joining the ends, open the stack into a fan. If the glue is still wet or the panels slide, let the stack dry flat for the time on your glue label. You can finish the final join afterward.
Add a stem and open the shape
Cut a short, narrow stem from brown or green paper. Glue its lower end near the top of the folded stack. Keep enough above the paper circles to see it once the pumpkin opens.
Bring the first and last unglued faces together to close the fan into a round shape. Glue those faces together and line up the folds. Gently spread the panels once the joins can hold their shape.
Let the final seam dry before moving the pumpkin. You can display it in a small dish or lay it on its side. If you want an upright tabletop version, trim the same tiny flat section from the bottom of every circle before folding, so the panels share a level base.
For crafts on real pumpkins, our pumpkin-painting night guide has a separate plan for paint, brushes, and transport.
Cut ghost gift tags from the offcuts
For each tag, start with a piece of light card about 2 by 3 inches. Add a pencil, scissors, a marker, a hole punch, and a short piece of string or ribbon. Make the tag larger if you want room for a longer note.
Draw a rounded head and a wavy bottom, leaving the upper part wide enough for a hole. Cut the shape, then draw a face on one side. Write a friend's name or a short message on the back.
Punch a hole near the top with room around the edge. Thread string through it and tie the tag to a bag or wrapped gift. Keep the tag outside any food packaging. It can also go in a journal pocket after the night.
For another paper-decor idea, Crayola's haunted-house countdown craft uses paper shapes in a larger Halloween project. Follow its own supply and assembly directions if you choose that version.
Plan for drying and getting the crafts home
Give the table a place for flat pieces to dry without being stacked. Put a name on the scrap paper beneath each person's work. Follow the glue maker's drying time, which can vary with the product and the amount you used.
A garland can travel loosely wrapped around a piece of card once its details are dry. A folded pumpkin needs a small box or a protected spot where bags will not press its panels flat. Tags can go in an envelope.
If a piece still needs time, leave it to dry and arrange another time to collect it. You can take a photo of the table before clearing the scraps, then save that moment in a fall scrapbook.
Questions about whimsical Halloween crafts
What makes these Halloween crafts whimsical?
Friendly faces, small paper shapes, and playful color give them that feel. You can choose bows, rosy cheeks, or a ghost with a serious expression.
Do we need a cutting machine?
These projects use scissors and shapes you draw yourself. A hole punch helps with the garland and tags, while a round object can guide the pumpkin circles.
Can we finish everything in one evening?
You can plan an evening for making, but glued parts may need longer to dry. Choose one project and use your glue's instructions when deciding when to move or pack it.
Can we use paper we already have?
Clean scrap paper can suit the shapes and pumpkin panels. Use firmer paper for pieces that need to hold a punched hole, and check that the paper works with your glue.
How can we hang a garland in a dorm?
Use only the hanging method allowed by your dorm and suited to the surface. Keep paper clear of heaters, lights, and exits, or display the pieces on a shelf instead.
Send your friends a photo of the project you want to make and a time to bring their paper scraps.