
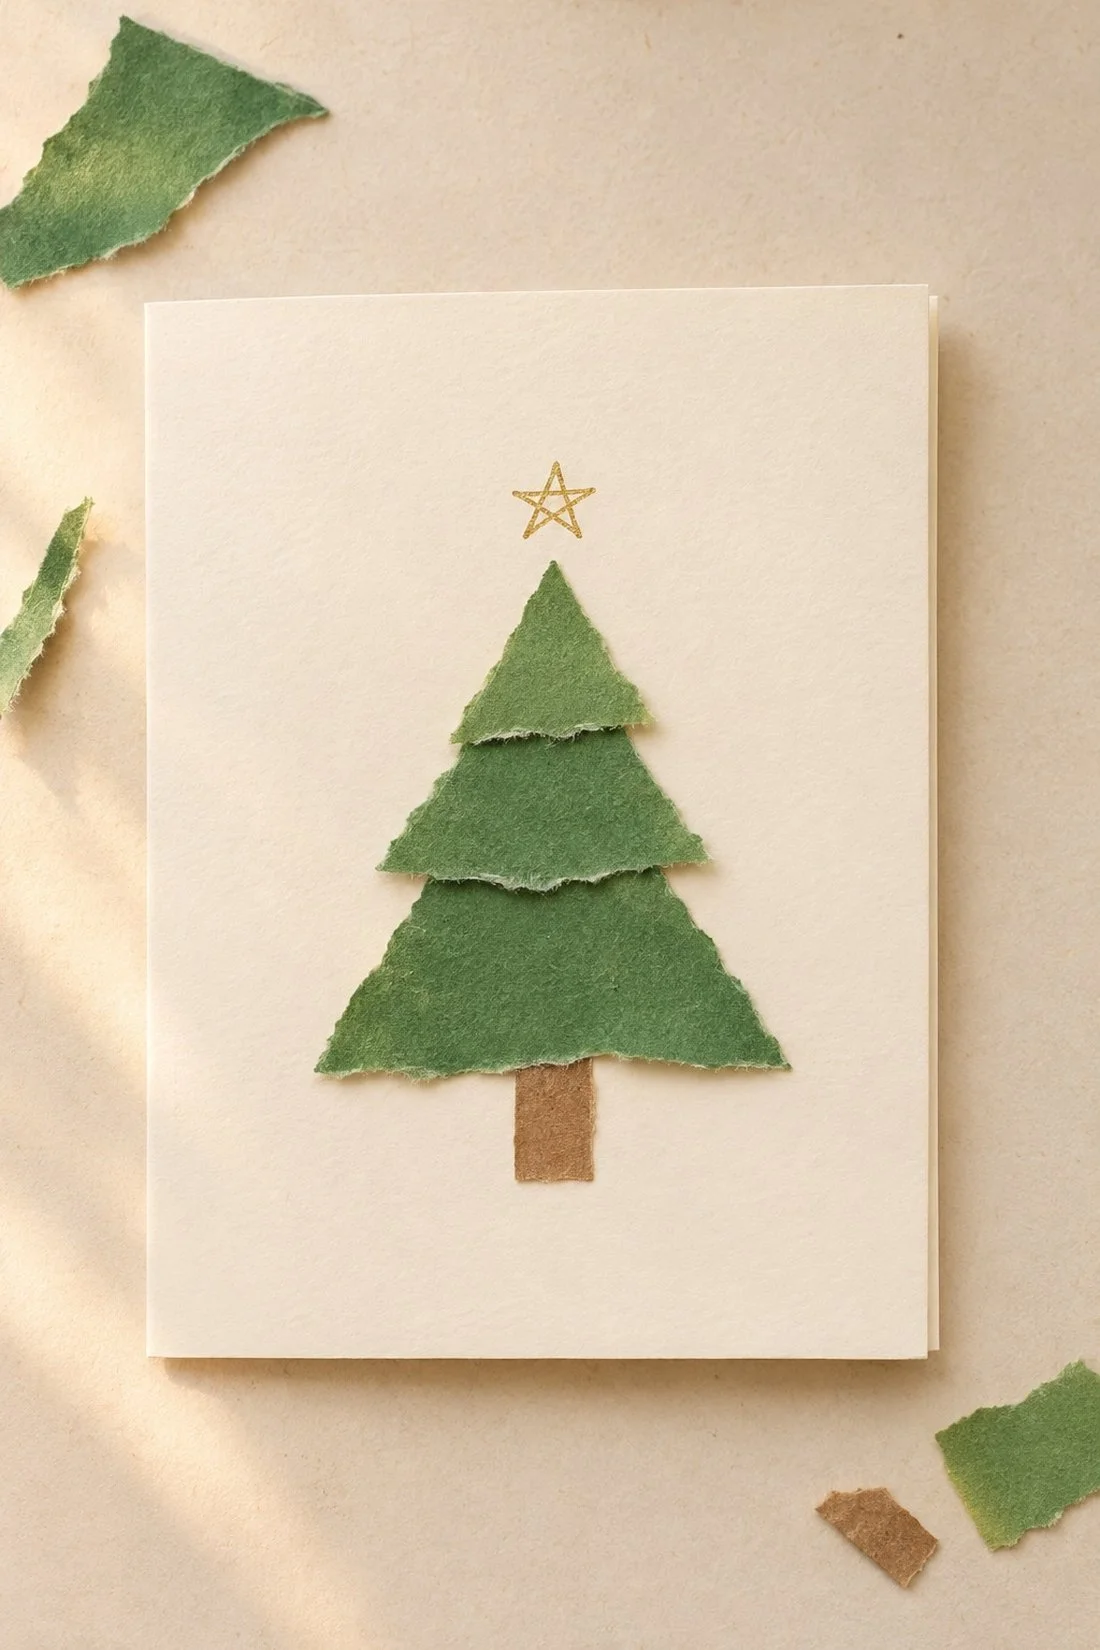
A cream card, a little burgundy ribbon, and a green paper tree make a very cute reason to bring out the craft supplies. Handmade Christmas cards can be as simple as one shape on the front and a few handwritten lines inside.
These seven designs use paper, paint, tape, stamps, or ribbon. Pick your favorite for a small matching batch, or make a different one for each friend. The pink-and-red ornaments are especially tempting if your Christmas color palette has already wandered into the pink aisle.
Start with the card and envelope
Blank folded cards with matching envelopes make the sizing easy. For a paper version, cut an 8½-by-11-inch sheet of cardstock in half across its long side. You'll have two 8½-by-5½-inch pieces. Fold each across the 8½-inch side to make a card that's 4¼ inches wide and 5½ inches tall. Those finished cards fit standard A2 invitation envelopes.
For the paper designs, gather scissors, a pencil, a ruler, a glue stick, and colored scraps. Add a black or gold pen for little details. You'll only need paint, stamps, or ribbon for the designs that use them.
If a few friends want to join in, our Christmas craft night plan has ideas for sharing supplies and setting up the table. Cards can be the whole evening's project.
1. Torn-paper Christmas trees
You'll use: a cream card, two shades of green paper, a brown scrap, a glue stick, and a gold pen.
Tear three green triangles with bases around 2 inches, 1½ inches, and 1 inch wide. Arrange them on the front with the largest at the bottom, overlapping their tips to make a tree. The torn edges give the branches their shape, so the triangles can be a little uneven.
Slip a small brown rectangle beneath the bottom triangle for the trunk. When you like the arrangement, glue the trunk down first, then add the green pieces from bottom to top. Leave room below the tree for a short greeting.
Draw a tiny gold star at the top. One tree looks lovely on its own; three smaller ones make a whole forest across the card.
2. Pink-and-red watercolor ornaments
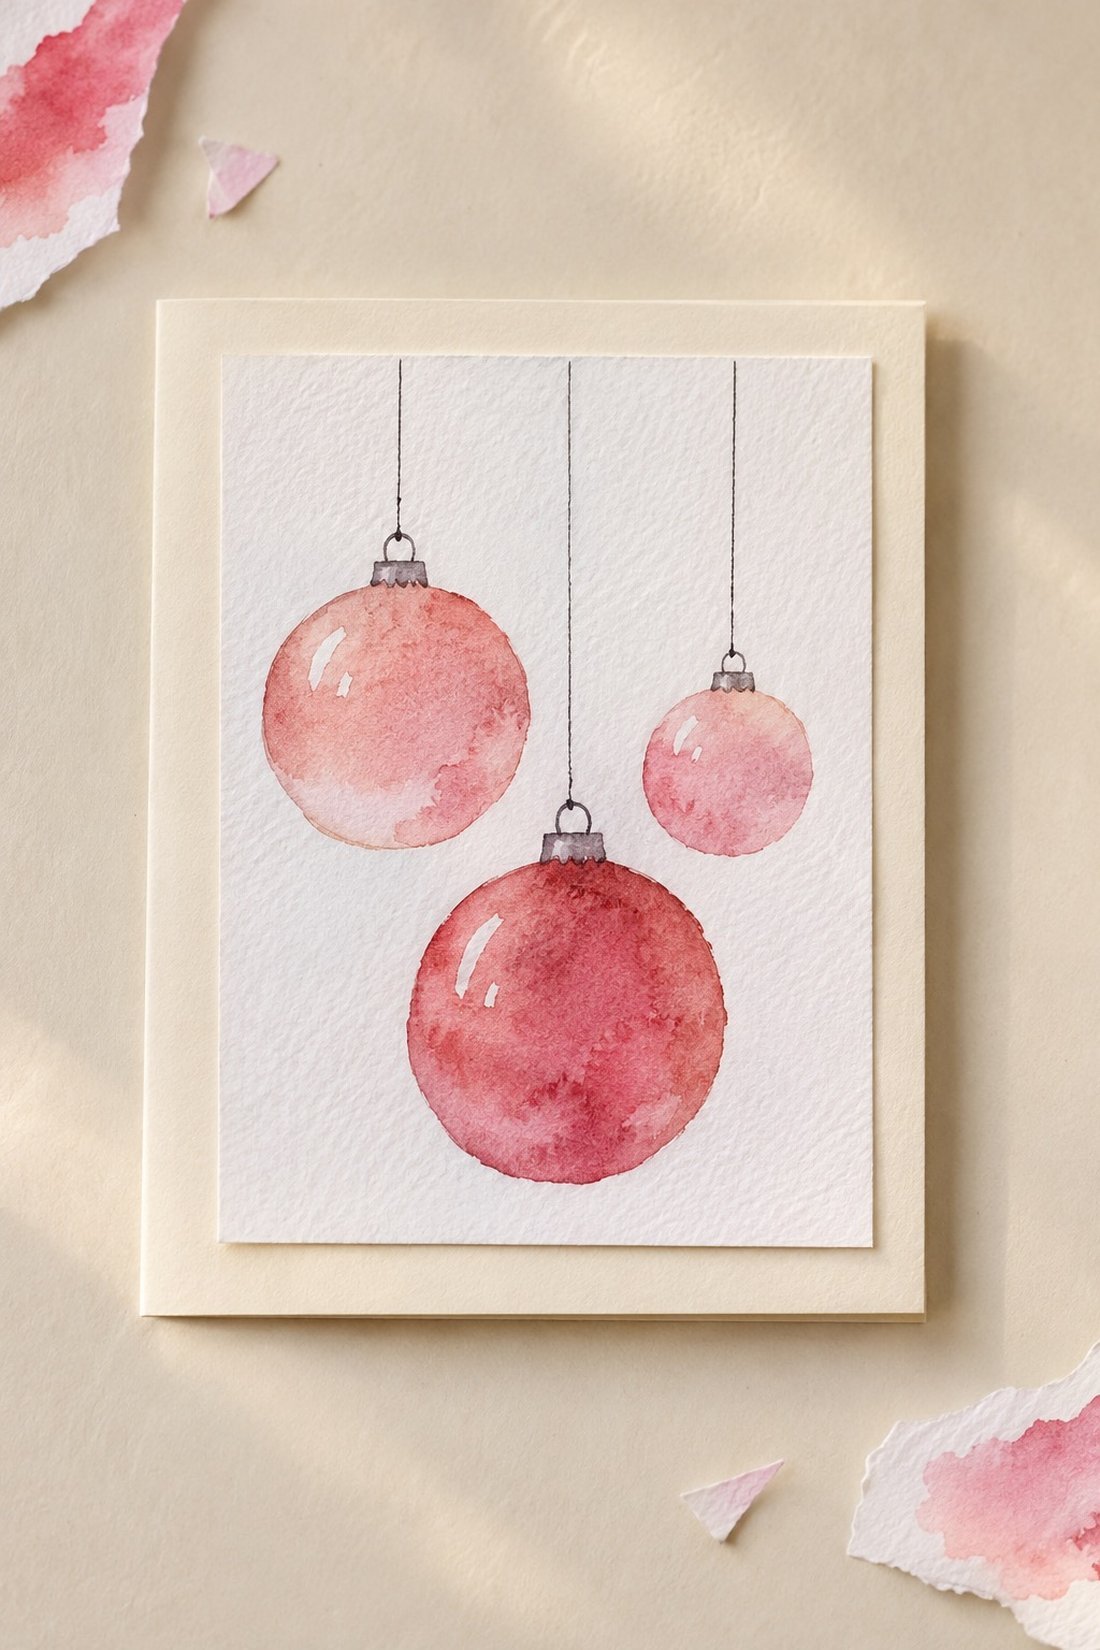
You'll use: watercolor paper, pink and red watercolor paint, a small round brush, water, a pen, and a blank card.
Cut a watercolor panel about 3½ by 4¾ inches. Lightly draw three circles in different sizes, leaving space above them for hanging strings. Paint each circle with a light wash of color, keeping a small spot of white paper near one edge for a highlight.
Watercolor behaves differently on wet and dry paper. Strathmore's watercolor painting tip explains how wet paint can flow into an area you intended to leave light. For these ornaments, start on dry paper and work one circle at a time so you can see where the color goes.
Once the paint is dry, draw a tiny cap above each circle and a thin string reaching toward the top of the panel. Mount the panel on the card, leaving a cream border. A blush ornament, a red one, and a smaller pink one are a very good trio.
Watercolor paper is useful here because ordinary thin paper can buckle as it gets wet. Strathmore's explanation of stretching watercolor paper describes that response to water. A small panel with light washes keeps this card project simple; let it dry flat before mounting.
3. Washi-tape presents
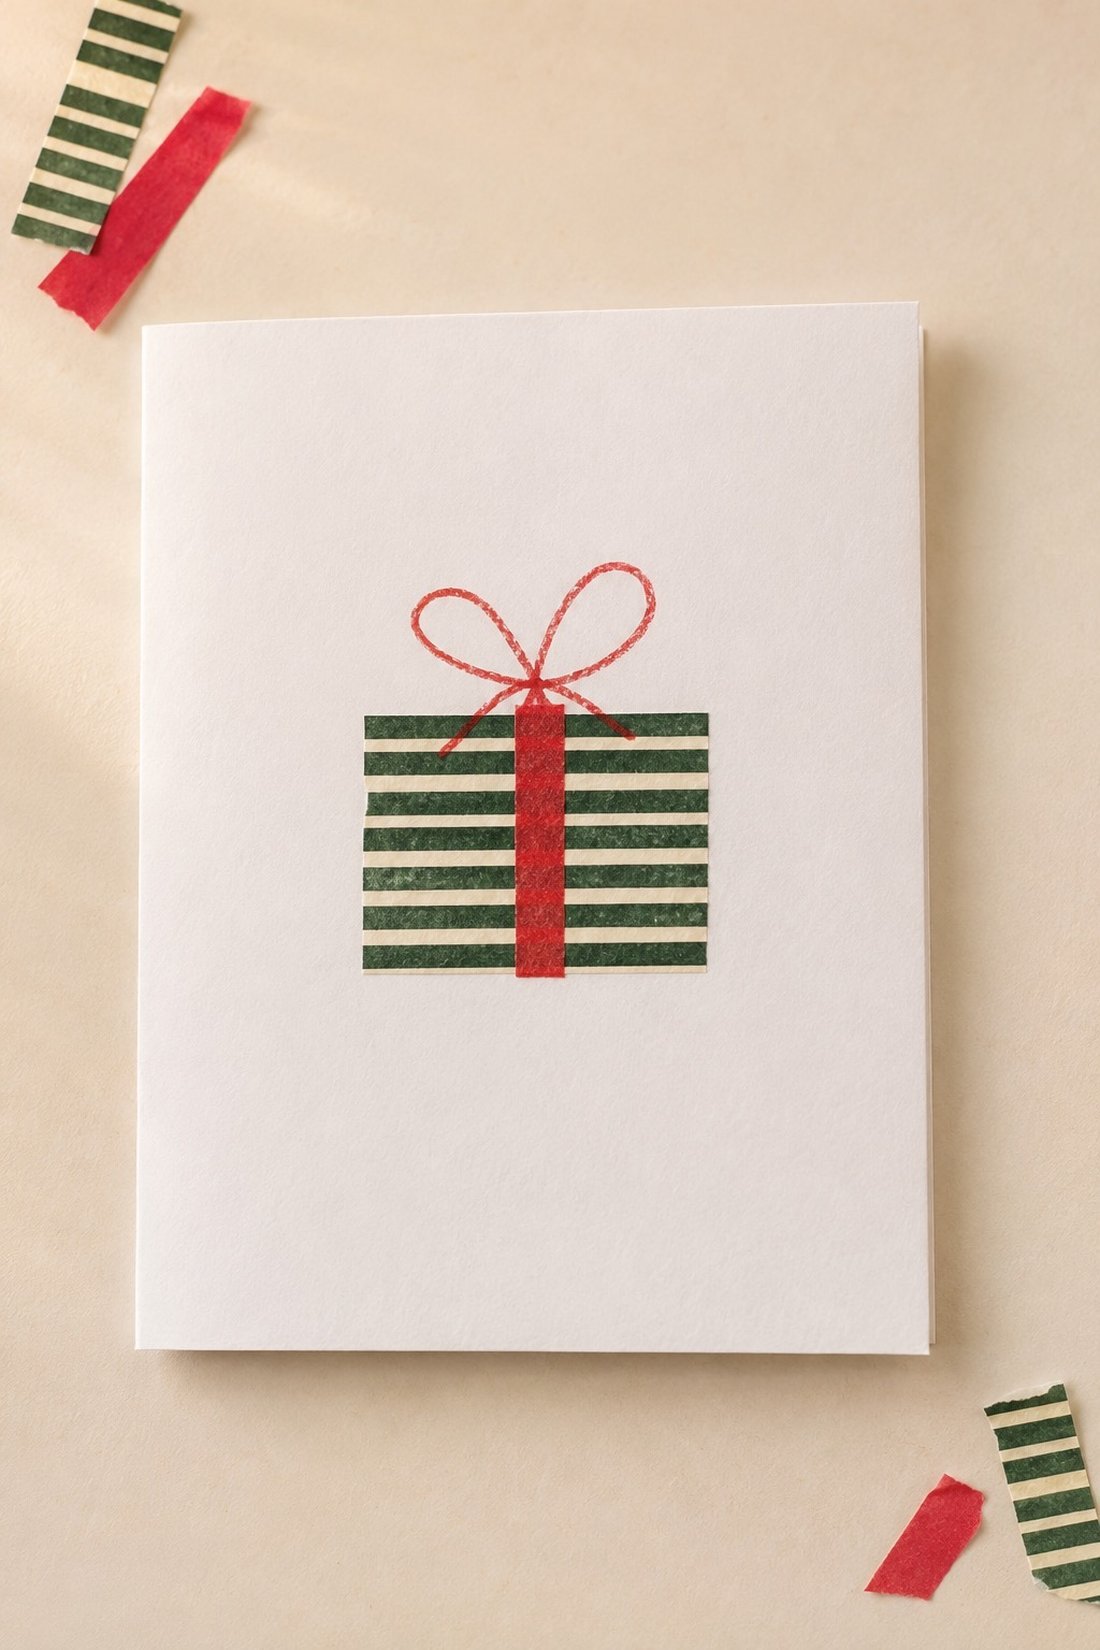
You'll use: a white card, two or three rolls of washi tape, scissors, and a pen.
Make a gift box on the front by laying short strips of tape beside each other to form a rectangle about 1½ inches wide. Trim the strip ends before placing them, or tear them for a softer edge.
Use a contrasting tape for one narrow vertical ribbon down the box. Draw two loops and two short tails above it for a bow. Add a second, smaller present beside the first if you'd like a little stack.
Red stripes with forest green look wonderfully Christmassy. Pink tape with a burgundy pen bow is another favorite. The tape does most of the decorating, which makes this a good design for a batch of cards.
4. A scalloped frame with a gold star
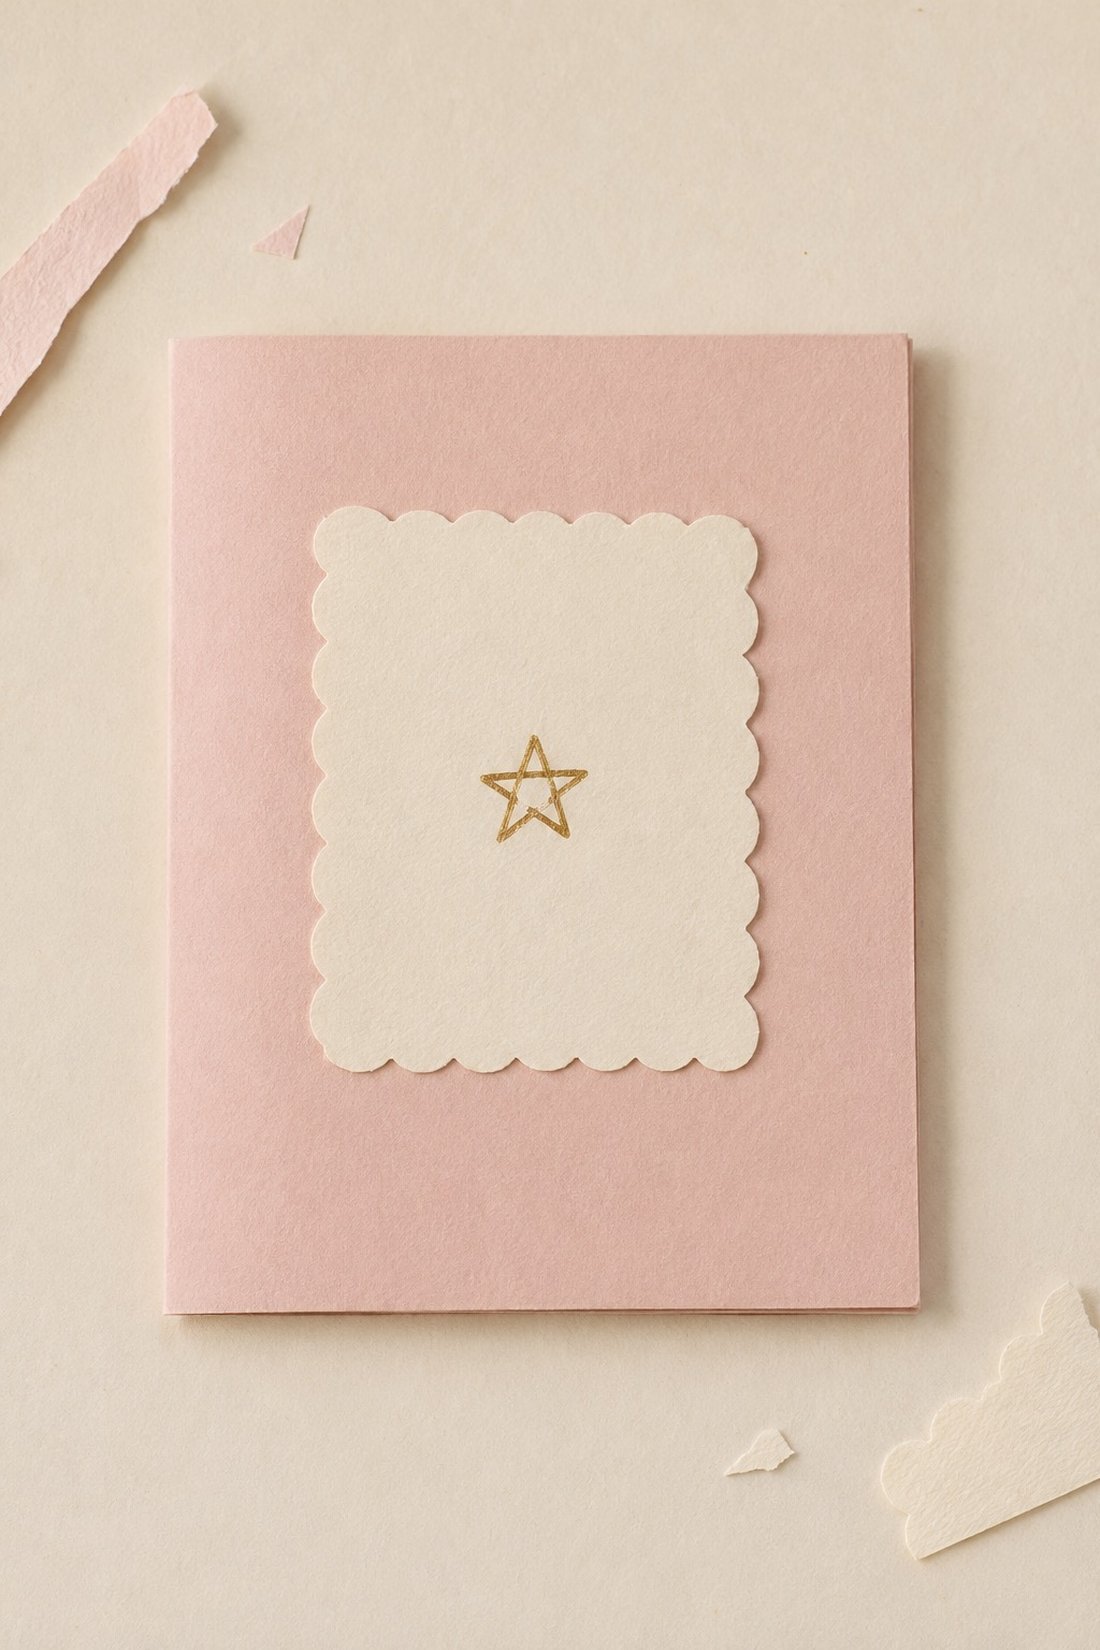
You'll use: a blush card, cream paper, scissors, a pencil, a glue stick, and a gold pen.
Cut a cream rectangle about 3 by 4 inches. Lightly sketch small rounded scallops around its edge, then cut along the outline. Think of it as a little paper postage stamp with rounded edges.
Glue it to the middle of the blush card. Draw one gold star in the center, leaving plenty of cream paper around it. A tiny “Merry Christmas” beneath the star finishes the front.
For a slightly different version, dot the scalloped border with burgundy pen. The cream, pink, and gold combination feels especially pretty next to a matching blush envelope.
5. A paper-leaf wreath
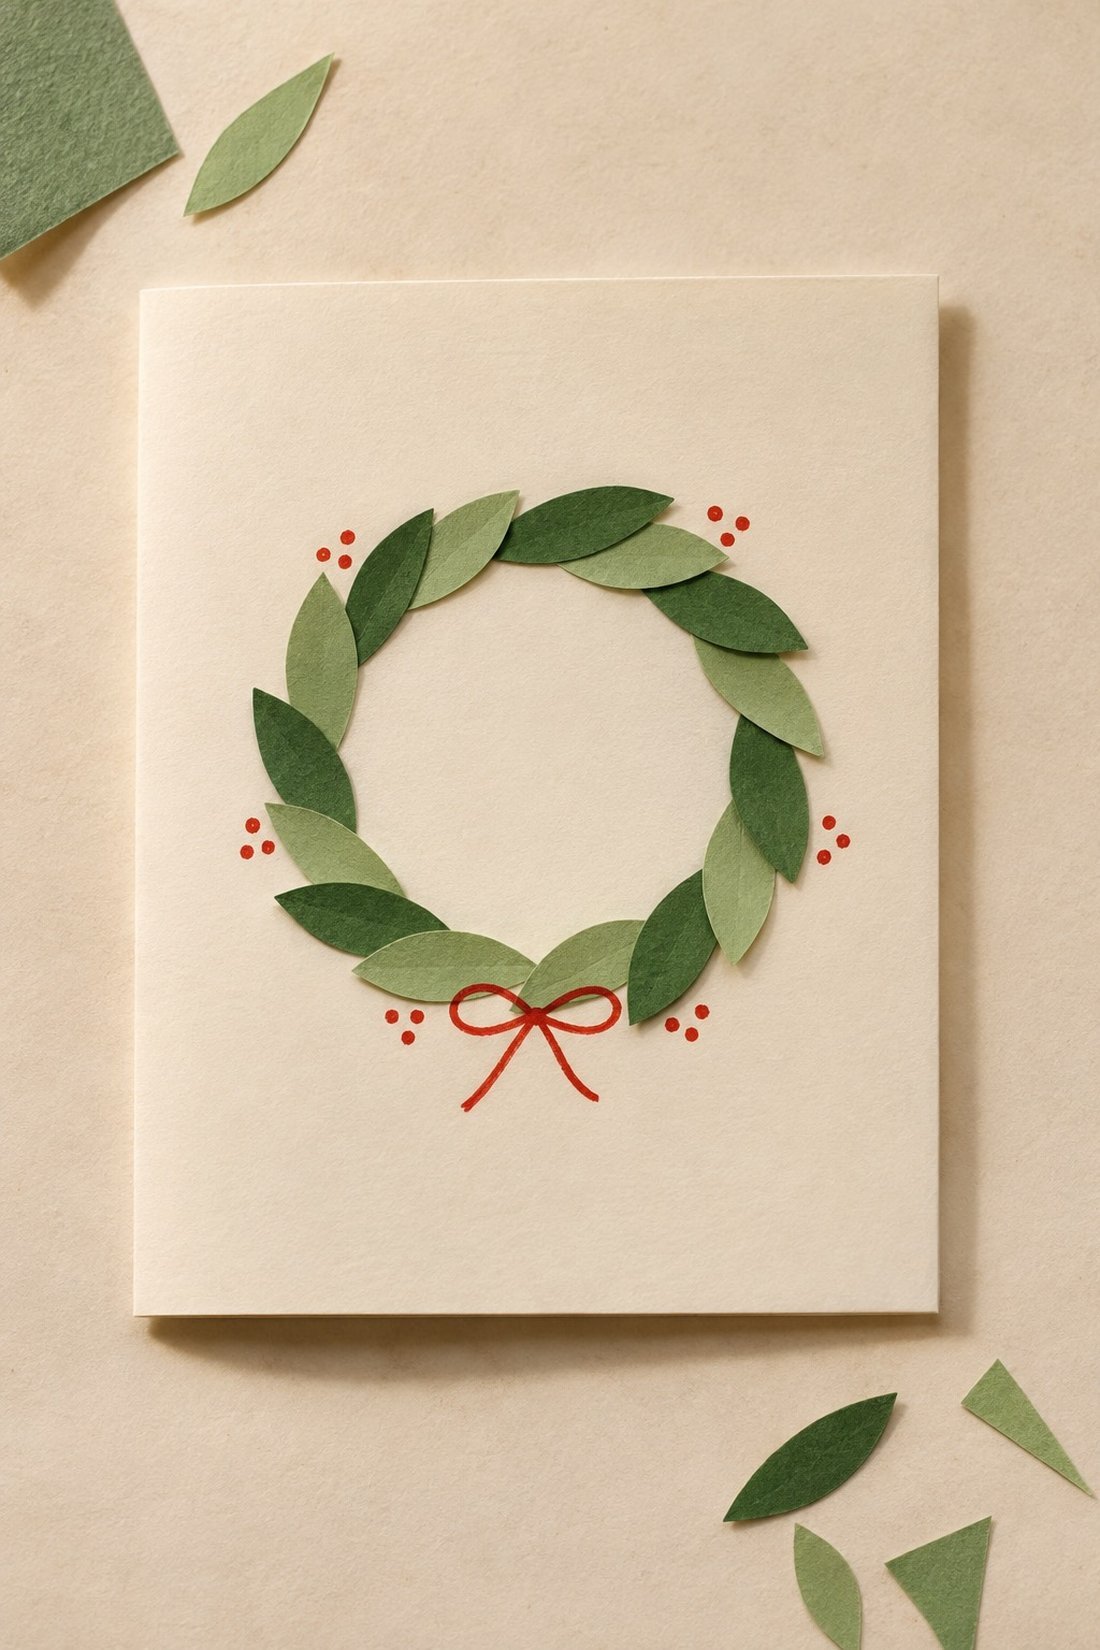
You'll use: a cream card, green paper, a pencil, scissors, a glue stick, and a red pen.
Draw a light circle about 2½ inches across on the card front. Cut small pointed oval leaves from green paper, around ¾ inch long. Two green shades will give the wreath a little variation.
Arrange the leaves around the circle with their tips pointing in the same direction. Overlap them slightly so the pencil line disappears beneath the paper, then glue them in place. Add a few red pen dots between the leaves for berries.
A drawn bow at the bottom keeps the whole wreath flat. You can leave the center open or write your friend's initial inside it.
6. Gold stamped stars
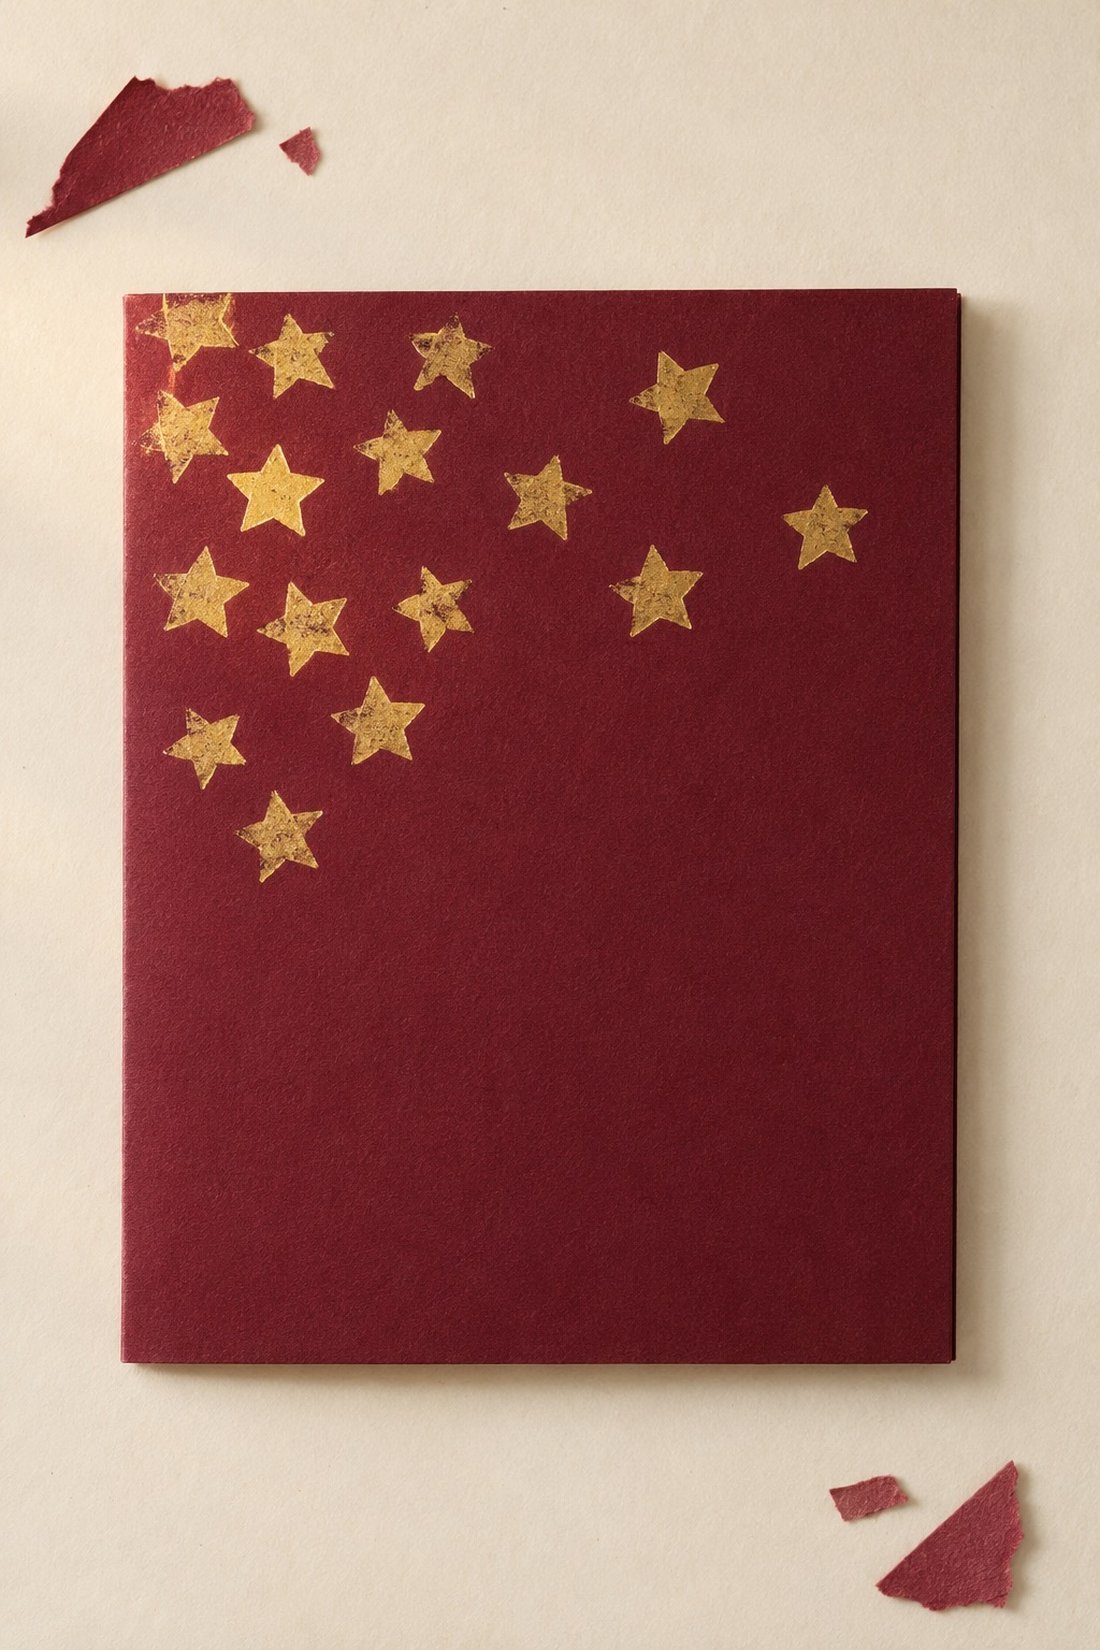
You'll use: a burgundy or dark green card, a small star stamp, and opaque gold craft ink suitable for dark paper.
Try the stamp on a scrap first to see how the gold shows up. Then stamp a loose cluster across the upper half of the card. Turn the stamp a little between impressions and leave different amounts of space between the stars.
Let the ink dry according to its label before adding writing or stacking the cards. A cream paper insert gives you a light place to write inside a dark card.
This one looks especially good with the stars concentrated in one corner, as if they've drifted across the front.
7. A burgundy ribbon bow
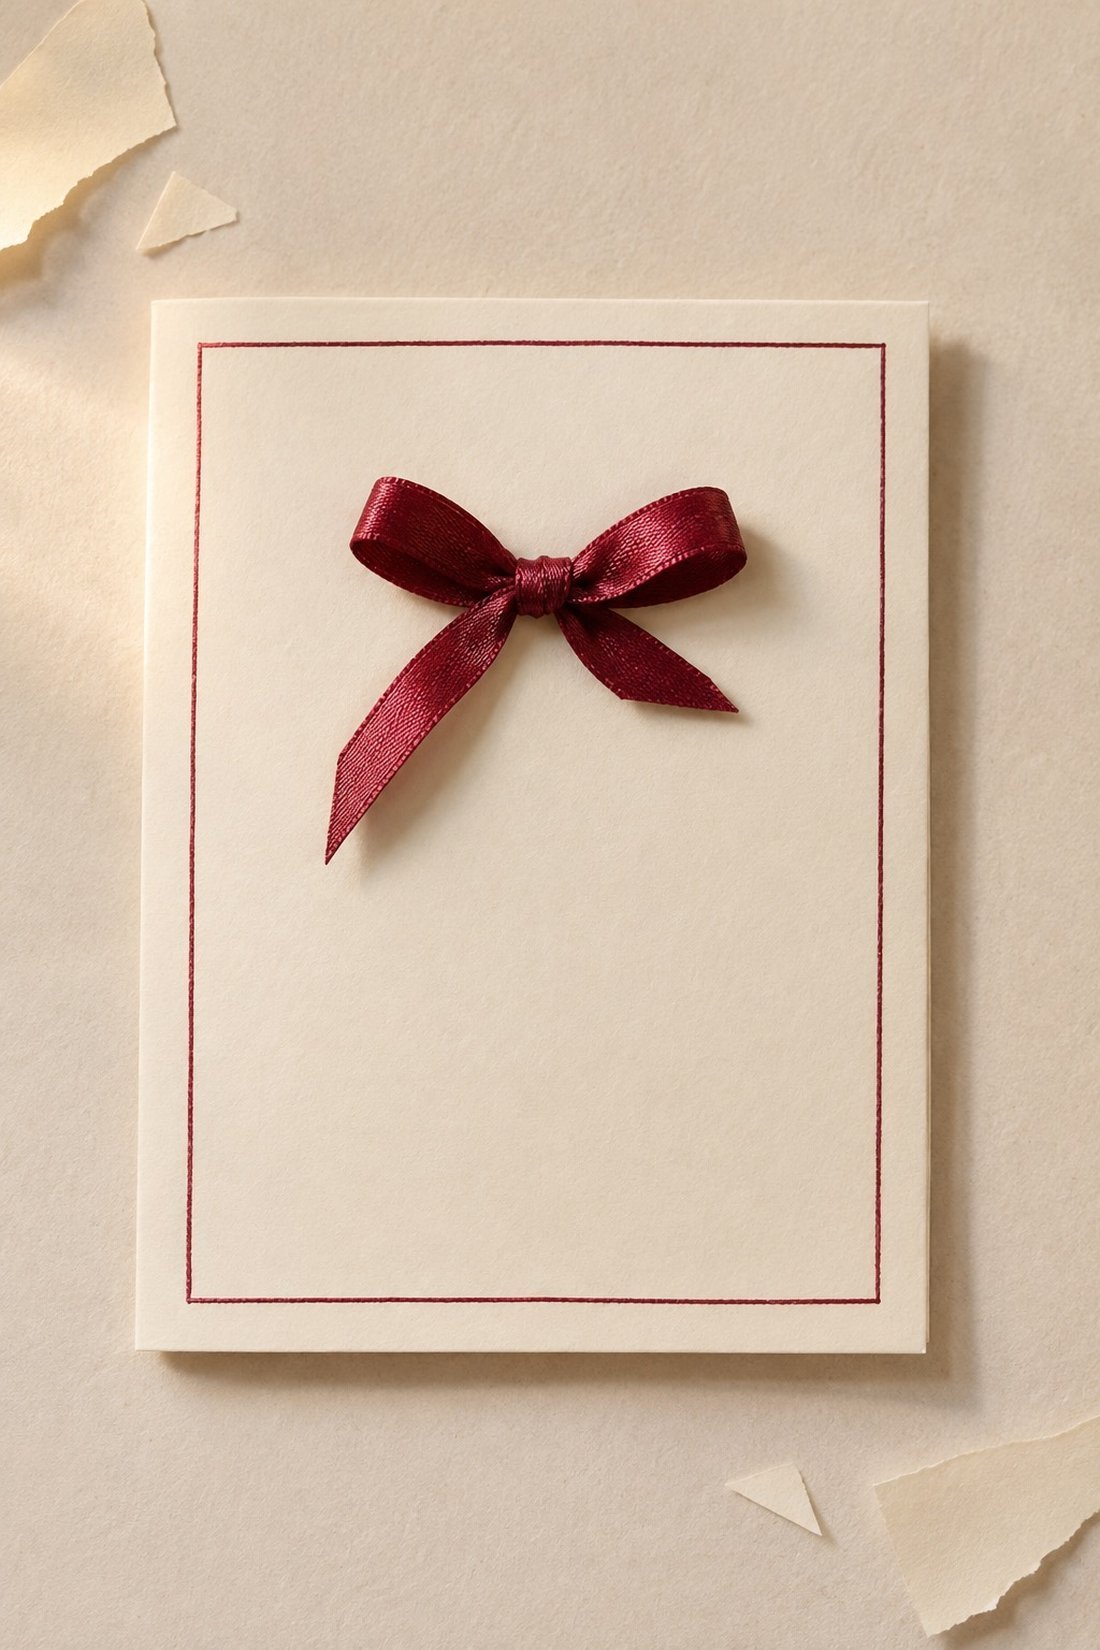
You'll use: a cream card, narrow burgundy ribbon, scissors, paper-craft adhesive suitable for ribbon, and a pen.
Tie a small bow, adjust the loops, and trim the tails at an angle. Arrange it near the top of the card with room below for your greeting. Attach the knot and the backs of the loops with a little adhesive, following the adhesive's drying instructions.
Draw a fine burgundy line around the front, about ¼ inch from the edges. The border and bow do plenty on their own.
This is a lovely card to tuck into a gift bag or hand to someone over coffee. A real ribbon bow adds dimension, while a drawn bow gives you a flatter version for an envelope.
A few words for the inside
A specific note makes each card feel like it belongs to its person. You could write, “Merry Christmas! I'm so glad we got to take that little trip together this year,” or “Saving you a seat for our next movie night.”
For more wording ideas, our short Christmas quotes for cards and gift tags pairs well with the handmade front. Leave a little space beneath your message for your name and the year.
A green paper tree on the front, a memory inside, and a cream envelope with your friend's name on it. Ready for its own spot on the mantel.
