Thanksgiving centerpieces for a small table work best when you can pick them up with one hand and still see the person across from you. A bowl of pears, three little vases, or a folded-paper display gives the middle of the table something fun to do. The mashed potatoes get to have a spot too.
For Friendsgiving, we'd start in the cupboard before heading to the store. Pull out a tray, a shallow bowl, and any small vases you already own. One of those can hold the whole arrangement. Then choose the idea that fits your table and the things you like: flowers, fall fruit, little pumpkins, paper fans, or a warm glow.
These five options are separate builds, so you can choose one for your dinner. No matching dishes required.
Make room for Thanksgiving centerpieces before buying anything
Set a place for each guest first, then put your empty serving bowls on the table to see what space is left. Your centerpiece belongs in that remaining space. If dinner will be served from a counter, you'll have more room for decorations, but everyone still needs space for a glass and their elbows.
Try the arrangement from a seated view. A vase that looks small when you're standing may sit right in front of your friend's face. Move it to one side or use a shorter container. You should be able to pass bread across the table without asking the flowers to duck.
For a round table, we'd use one compact bowl or tray. On a narrow rectangle, try a short row of little pieces. Keep a space between each piece so serving dishes have somewhere to land. A runner can connect them, but the bare table works too.
If you're still deciding where everyone will eat, our guide to hosting Friendsgiving in a small space covers seats and serving spots. Settle those first, then measure the space your centerpiece can use.
Choose a spending limit before you shop. Treat it as a ceiling for the whole project, including flowers, ribbon, and anything needed to hold the arrangement. Prices vary, so these ideas don't come with a promised total. Using a bowl you own gives you more of that budget for the part you want to look at.
1. A shallow bowl of pears and ribbon
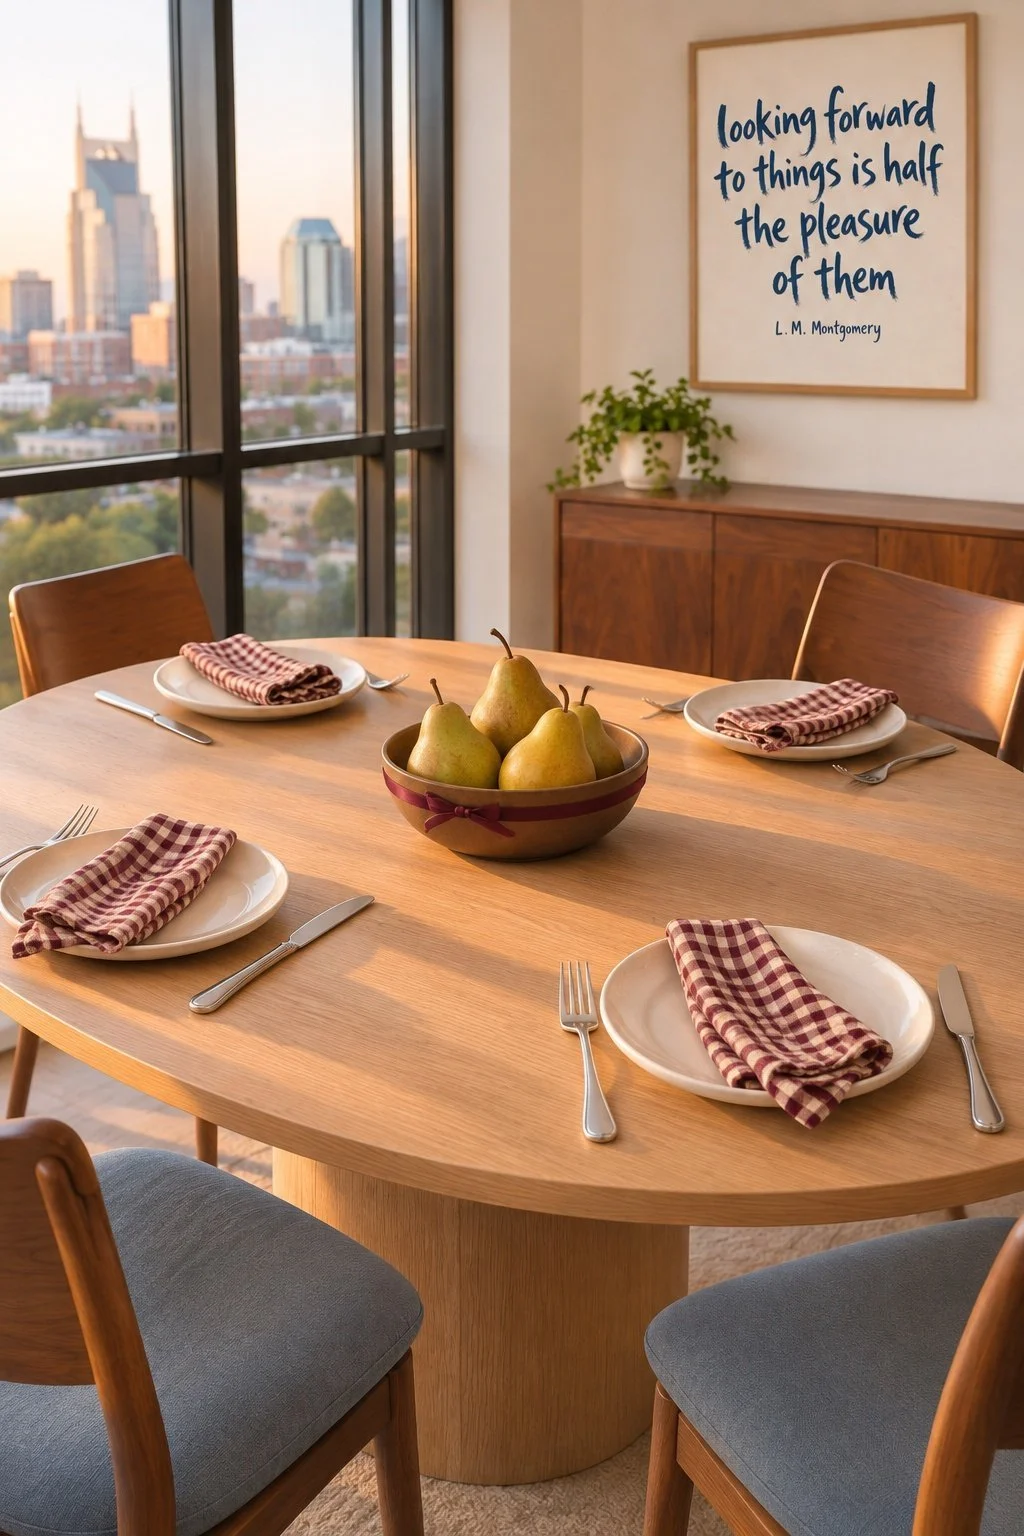
A few pears in a shallow bowl make a compact centerpiece with almost no setup. Choose a bowl that sits firmly, then place the pears inside with their stems pointing in slightly different directions. Leave enough of the bowl showing to see its shape.
Green pears look good against brown pottery. Golden pears would be pretty in a white bowl, especially beside burgundy napkins. Pick one color from your dishes or table linen and repeat it with a ribbon tied around the bowl's base, away from the fruit.
The bowl doesn't need to be full. Three or four pears can give you a clear little arrangement, depending on its size. Try one near the front and the others behind it. Turn the bowl and check the view from the other seats before you settle on the shape.
Keep this as a fruit display, with craft supplies separate from anything you plan to eat. Skip glitter, paint, and floral foam. If you'd rather use faux fruit, keep it as decoration and store it with the ribbon afterward.
This is our pick for a small round table. When the serving bowls arrive, you can move the whole centerpiece to a shelf. The pears make a very convincing case for using the fruit bowl you already have.
2. Three little vases from one bunch of flowers
Split a bunch of flowers between three small, clean vases for a low arrangement you can move piece by piece. Start with one vase, add a few stems, then see how much room it takes on the table. You may find that one is enough.
Choose flowers for their color and shape rather than trying to copy a large florist arrangement. Cream mums with burgundy blooms would look pretty for November. A bunch in one color works too. Keeping the flowers similar lets different little containers sit together.
Trim the stems to suit your containers, using a suitable clean tool. The University of Minnesota Extension recommends removing leaves below the waterline when preparing cut flowers. Add water and follow the care directions for the stems you buy.
Give the flowers a little room between them. One bloom can lean toward the center while another sits more upright. Keep the stems short enough that guests can see over the arrangement, and check that the vases have stable bases.
On a rectangle table, place the three vases in a loose row. On a small round table, group them together on a tray or use only the smallest one. Put the spare flowers by the drinks or entryway. One bunch can have more than one dinner assignment.
For a fuller flower-and-linen look, our Thanksgiving decorations for the whole month show another way to use fall colors. Keep this version small if your main goal is leaving room for dinner.
3. Mini pumpkins on a tray you can carry away
Put two or three mini pumpkins on a small tray to make a centerpiece you can clear in one move. Choose pumpkins that sit flat, then check that the tray fits between the place settings without reaching over a plate.
Mix two sizes for a little change in height. Cream and pale orange look good together, while all-orange pumpkins bring more color to a plain wood table. Use what you like rather than buying a whole matching set.
Keep the tray mostly clear. A folded cloth under one pumpkin can add a color you already have in the napkins. If you add ribbon, tie it around a pumpkin stem loosely and keep the ends on the tray. You still want to see the pumpkin itself.
Try the arrangement with a serving bowl beside it. If the table feels full, move the tray before dinner starts. It can sit on a sideboard during the meal and return for dessert, when a few of the larger dishes have gone.
Real pumpkins need a quick check as you use them. Take away any that soften or spoil, and protect the table with a suitable tray. Faux pumpkins can return next year. Either version works with everyday plates and the glassware already in your kitchen.
4. Folded-paper fans in fall colors
Fold colored paper into small standing fans for a centerpiece you can make before dinner day. Choose two or three colors, such as cream, rust, and muted pink. A shallow tray gives the paper pieces a defined spot in the middle of the table.
For each fan, fold a rectangle of paper back and forth in narrow, even strips. Fold the pleated strip in half, join the two inner edges with tape, then spread the outer folds into a half-circle. Press the joined edge firmly and let the straight base rest on the tray.
Test one before making the rest. Thicker paper holds its shape better than thin tissue, but it also needs a firm crease. If the fan tips, use a small loop of removable tape to help it stay on a suitable tray surface. Check the tape first so it won't damage the finish.
Make a few sizes and overlap them slightly. Keep them below your seated sightline. You could write a guest's name on a small matching card, but the fans can be the whole decoration. We like the rust one at the front, where its folded edges show.
Keep paper away from heat and open flames. The U.S. Fire Administration's candle fire safety guidance suggests battery-operated flameless candles as an alternative. For this paper display, we'd enjoy the folds and colors on their own.
5. A little cluster of flameless candles
Group a few battery-operated candles on a small plate or tray for a centerpiece with a warm glow. Choose a tray that fits their bases, and keep each candle upright. Follow the product's instructions for use and suitable surfaces.
Two heights can give the group shape without filling the table. Try a pair of shorter candles beside one slightly taller one. Check the view from your chairs before you add anything else. The glow can carry the whole arrangement.
If you already have candleholders, check that the flameless candles fit securely. A holder that was made for another size may not support them well. You can also use candles designed to stand on their own and save the holders for another time.
Pair the group with plain napkins, or borrow one color from our pink Friendsgiving table with handmade details. The two looks serve different tables: that one brings several projects together, while this one keeps the middle clear with a single small display.
Set it out once before your friends arrive
Put the finished centerpiece on the table with the plates, glasses, and serving dishes you'll use. Sit down, reach for a bowl, and check that nothing catches your sleeve. Move any extra pieces to another surface while you have time to choose their spot.
Take a quick photo if you want to remember the arrangement, then leave it ready for dinner. When the bread basket arrives, there's already a place for it.
You Might Also Like
What to bring when your kitchen is tiny
Friendsgiving games for after the plates are cleared