
Painted pumpkins, felt leaf napkin ties, and little clay dishes make good Thanksgiving crafts for adults. You can make them at home with common craft tools, then use them for a Friendsgiving table or give them to a friend who loves fall.
These seven projects cover painting, cutting, stitching, and clay. Pick one for an afternoon with friends, or set out two that share supplies. The felt leaves work for both napkin ties and a small wreath, so that second project can start with the scraps.
In the United States, Thanksgiving falls on Thursday, November 26, in 2026, as listed on the Office of Personnel Management's federal holiday calendar. Start the clay pieces a few days ahead. Paper crafts and napkin ties can fit closer to dinner, as long as you allow time for glue to dry.
Choose a craft that fits your evening
For a project you can pack flat, try the paper garland or stamped gift bags. For something you can use each November, choose faux pumpkins, felt coasters, or the yarn-wrapped hoop. The clay dishes need a safe drying spot where no one has to move them halfway through dinner.
Before friends come over, cover the table and set out scissors, scrap material, glue, and a place for wet pieces. Keep food on a separate surface from paint and clay. Read each supply label for its drying time and suitable surfaces. A short playlist can be the only other item on the agenda.
If you're also hosting dinner, our guide to hosting Friendsgiving in a small space helps you plan around the table you have. Keep a tray nearby for carrying finished crafts away when it's time to eat.
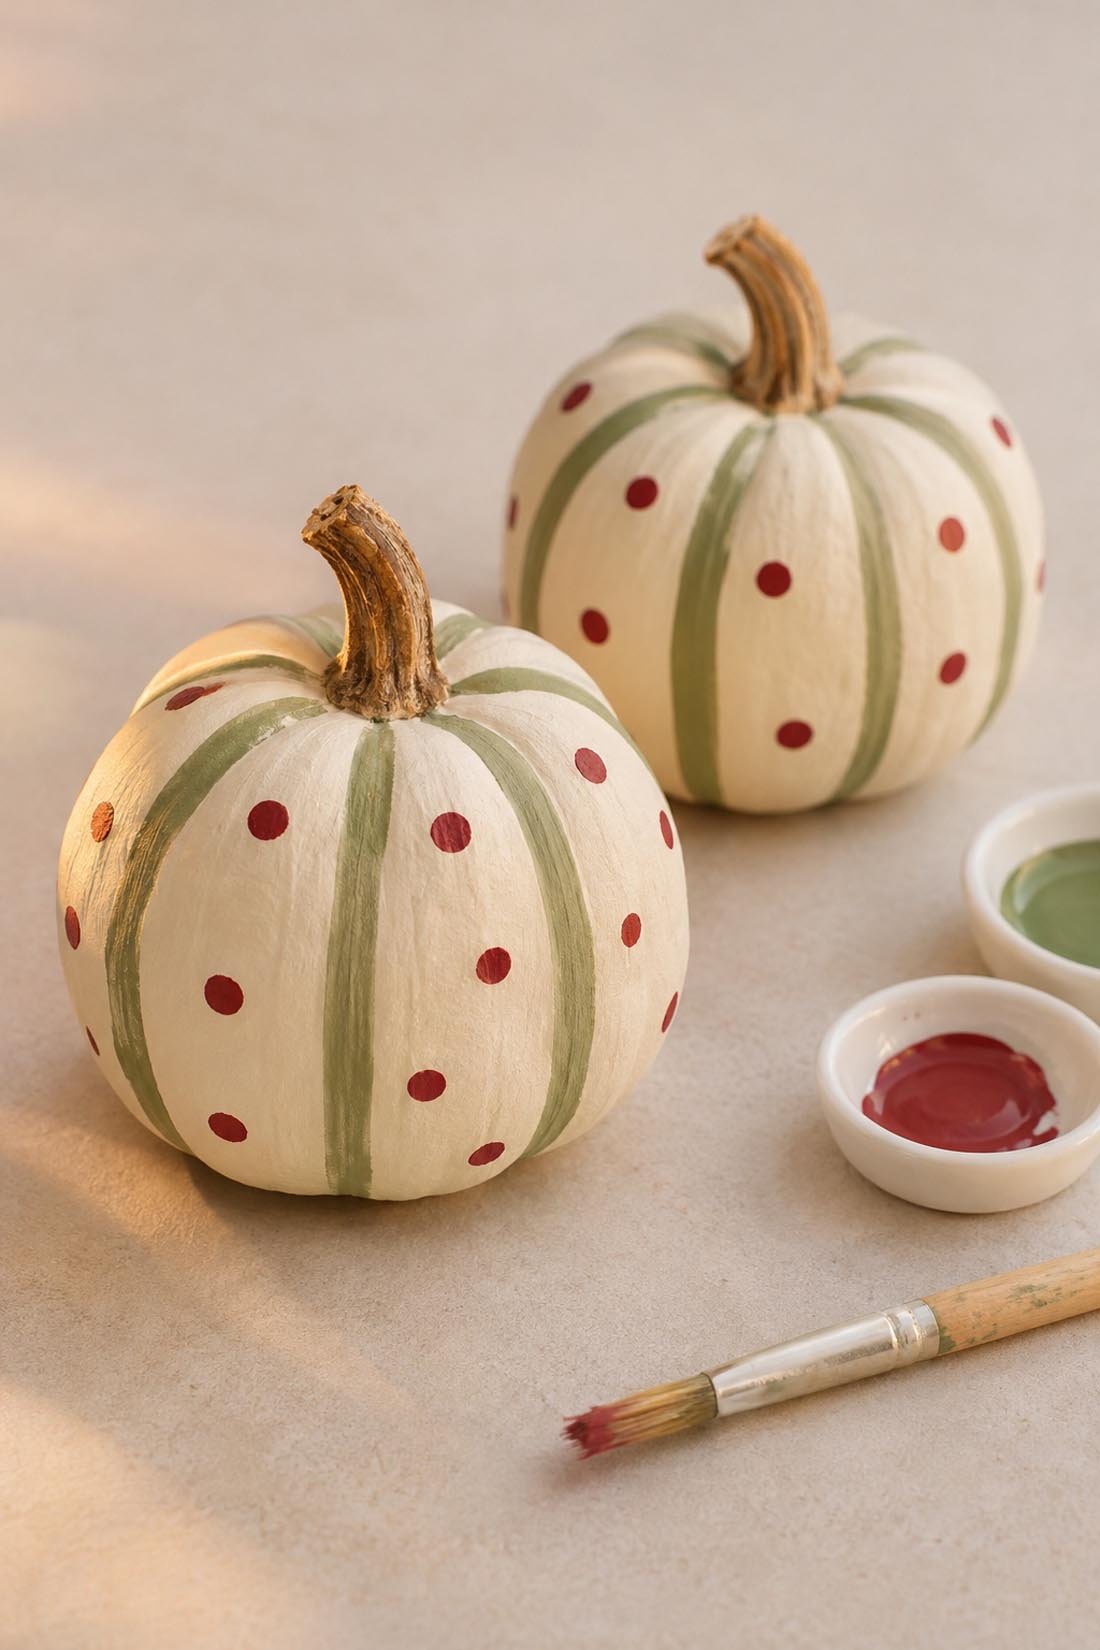
1. Paint striped and dotted pumpkins
Use small faux pumpkins, acrylic craft paint, a flat brush, and a small round brush. Cream, sage, and cranberry make a pretty set, and two pumpkins give you room to try different spacing. Choose a pumpkin whose label says it can be painted. Test the paint on the bottom first.
Wipe away dust and let the surface dry. Brush on a thin cream base coat, keeping the stem clear. Let that coat dry before adding another. Several thin coats give you more control around the ribs than one thick layer.
Paint sage stripes down a few grooves, turning the pumpkin as you go. Let the stripes dry. Add cranberry dots between them with the round brush. Try a dot on scrap material first so you know how much paint the brush holds. Leave space around each one.
Testors' painted-pumpkin project also uses craft acrylics for pumpkin designs. Follow your paint's label for the full drying time before wrapping or storing yours.
Set the pumpkins near the entry or on a shelf. For dinner, keep them small enough to leave room for serving dishes. Our Thanksgiving centerpiece ideas for small tables can help you choose a spot.
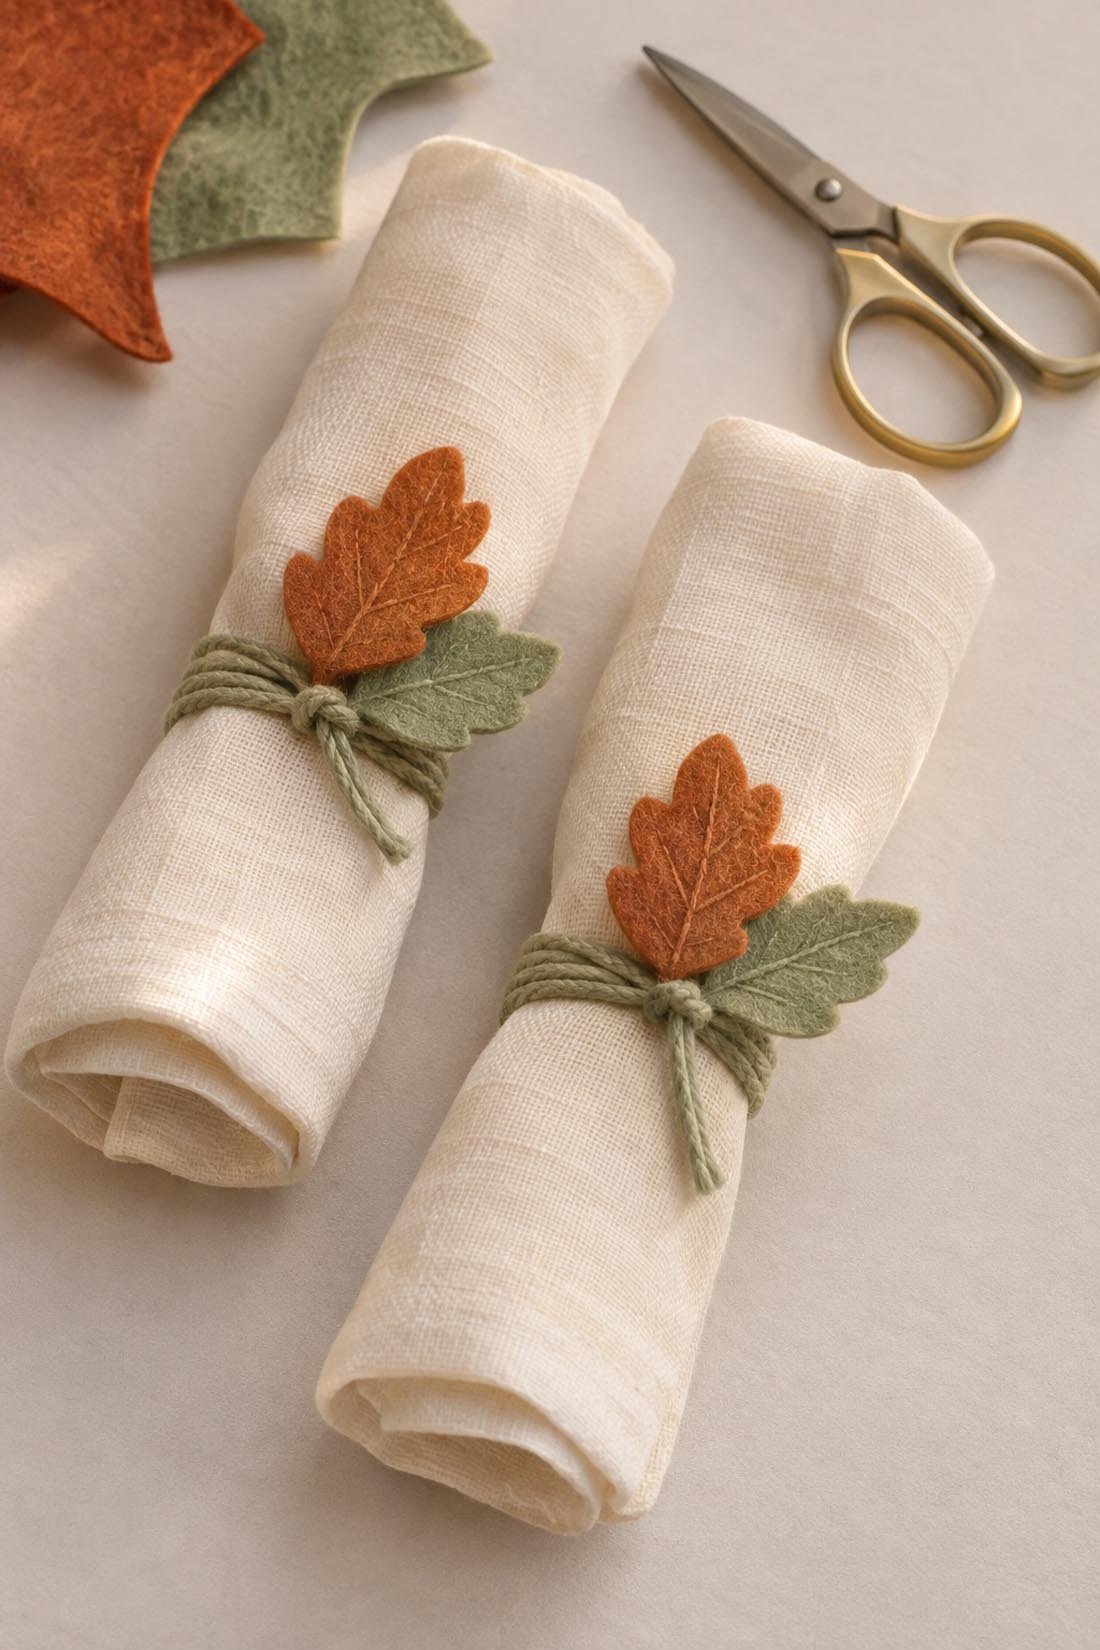
2. Make felt leaf napkin ties
You'll need felt, cotton cord, fabric glue, scissors, and a paper leaf shape to trace. Make the leaves about two to three inches long. A pointed oval is a good starting shape. Add rounded lobes if you'd like an oak-leaf look.
Cut one rust leaf and one sage leaf for each napkin. Before adding glue, place them over the cord and check how they sit together. Keep most of each leaf visible. If you want the fine veins shown on the leaves, add a few small stitches with matching embroidery thread before you attach them.
Wrap the cord around a rolled napkin and tie it. Slip the cord off the napkin, keeping its loop shape. Glue the two leaves together near their stems, then attach that small cluster over the knot. Put scrap material under the work and let the glue dry fully.
Slide the finished loop onto the napkin and turn the leaves toward the top. Keep glue away from the fabric so the ties come off for washing. You can store the ties flat and use different napkin colors next year. A sage leaf also looks lovely against a soft pink napkin.
3. Shape air-dry-clay leaf dishes
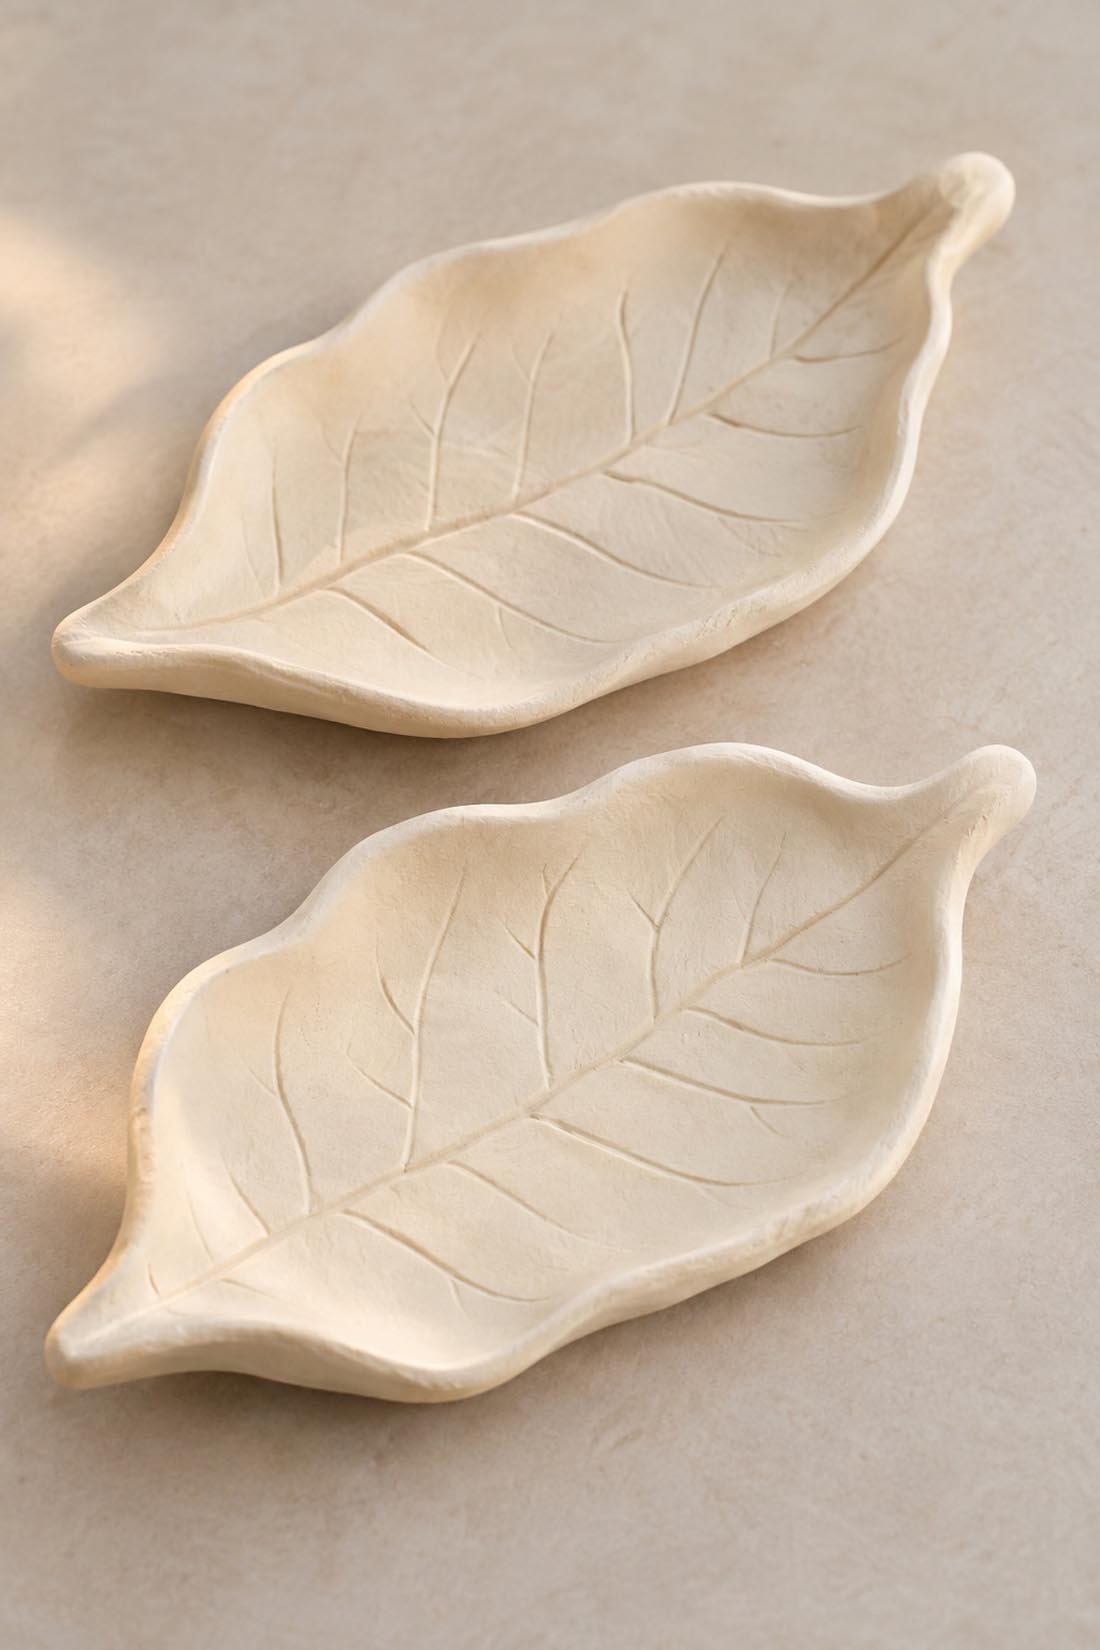
These small dishes give rings or desk clips a place to land. Use air-dry clay, a clean leaf with clear veins, a rolling tool, a blunt clay tool, and a shallow bowl for support. Choose a broad leaf around four inches long. Wash and dry it before use.
Roll the clay to an even thickness, about a quarter inch, on a surface suited to your clay. Press the leaf vein-side down, then lift it slowly. Cut around the outline with the blunt tool. Smooth the edge with a fingertip and only as much water as the clay maker allows.
Gently lift the shape into a shallow support lined with a smooth piece of plastic. Curve the edges up a little, keeping the middle broad enough for a ring. Follow the clay maker's advice for supporting, turning, and drying the piece. Don't speed it up with heat unless the maker allows that method.
Crayola's air-dry-clay guidance says its pieces can be sealed after they dry fully, after 72 hours. It also says sealing doesn't make them waterproof. Other clays may need different drying times.
Keep these dishes indoors for dry decorative use. Leave food, water, and candles out of them. If you plan to paint yours, wait until the clay is fully dry and test the finish on a small spare piece.
4. Cut a paper leaf garland
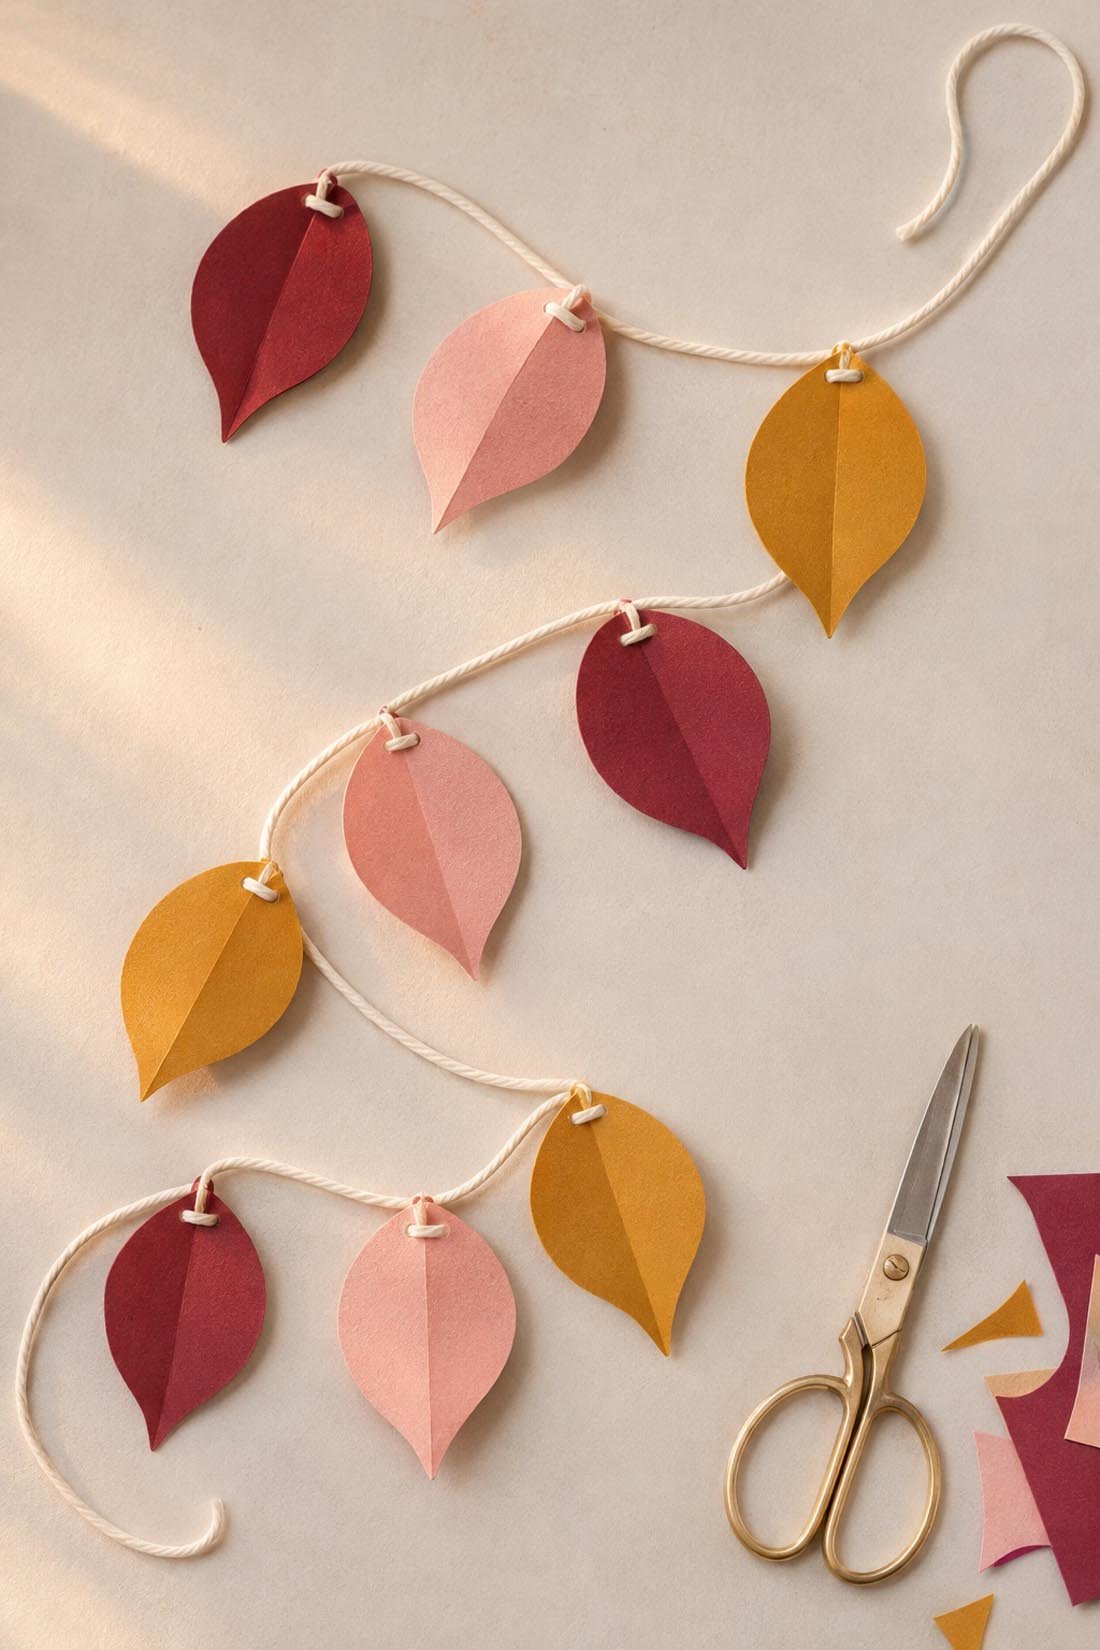
Choose cardstock in cranberry, blush, and ochre, plus cotton cord, a hole punch, and scissors. Start with a short piece of cord that fits the shelf or wall space you have. Leave extra length at both ends for tying.
Draw one leaf about three inches long and cut it out as a template. Trace it onto the other colors. Fold each cut leaf lightly down the center, then open it a little so the two sides catch the light. Make a hole near its broad top, with enough cardstock around the hole to keep it from tearing.
Lay the leaves beside the cord before you attach them. Alternate colors or try groups of three. Thread each leaf onto the cord and secure its spot with a loose knot. A small loop of thin cord through each hole is another way to hang the leaves from the main cord.
Lift the garland slowly to check the spacing. Keep it away from heaters and open flames. Wrap it around a piece of clean cardboard for storage so the leaves don't fold under one another.
For a different shared activity, our paper-leaf gratitude tree has space for notes from friends. This garland uses plain colored leaves, so you can focus on cutting and arranging.
5. Wrap a small hoop wreath with yarn
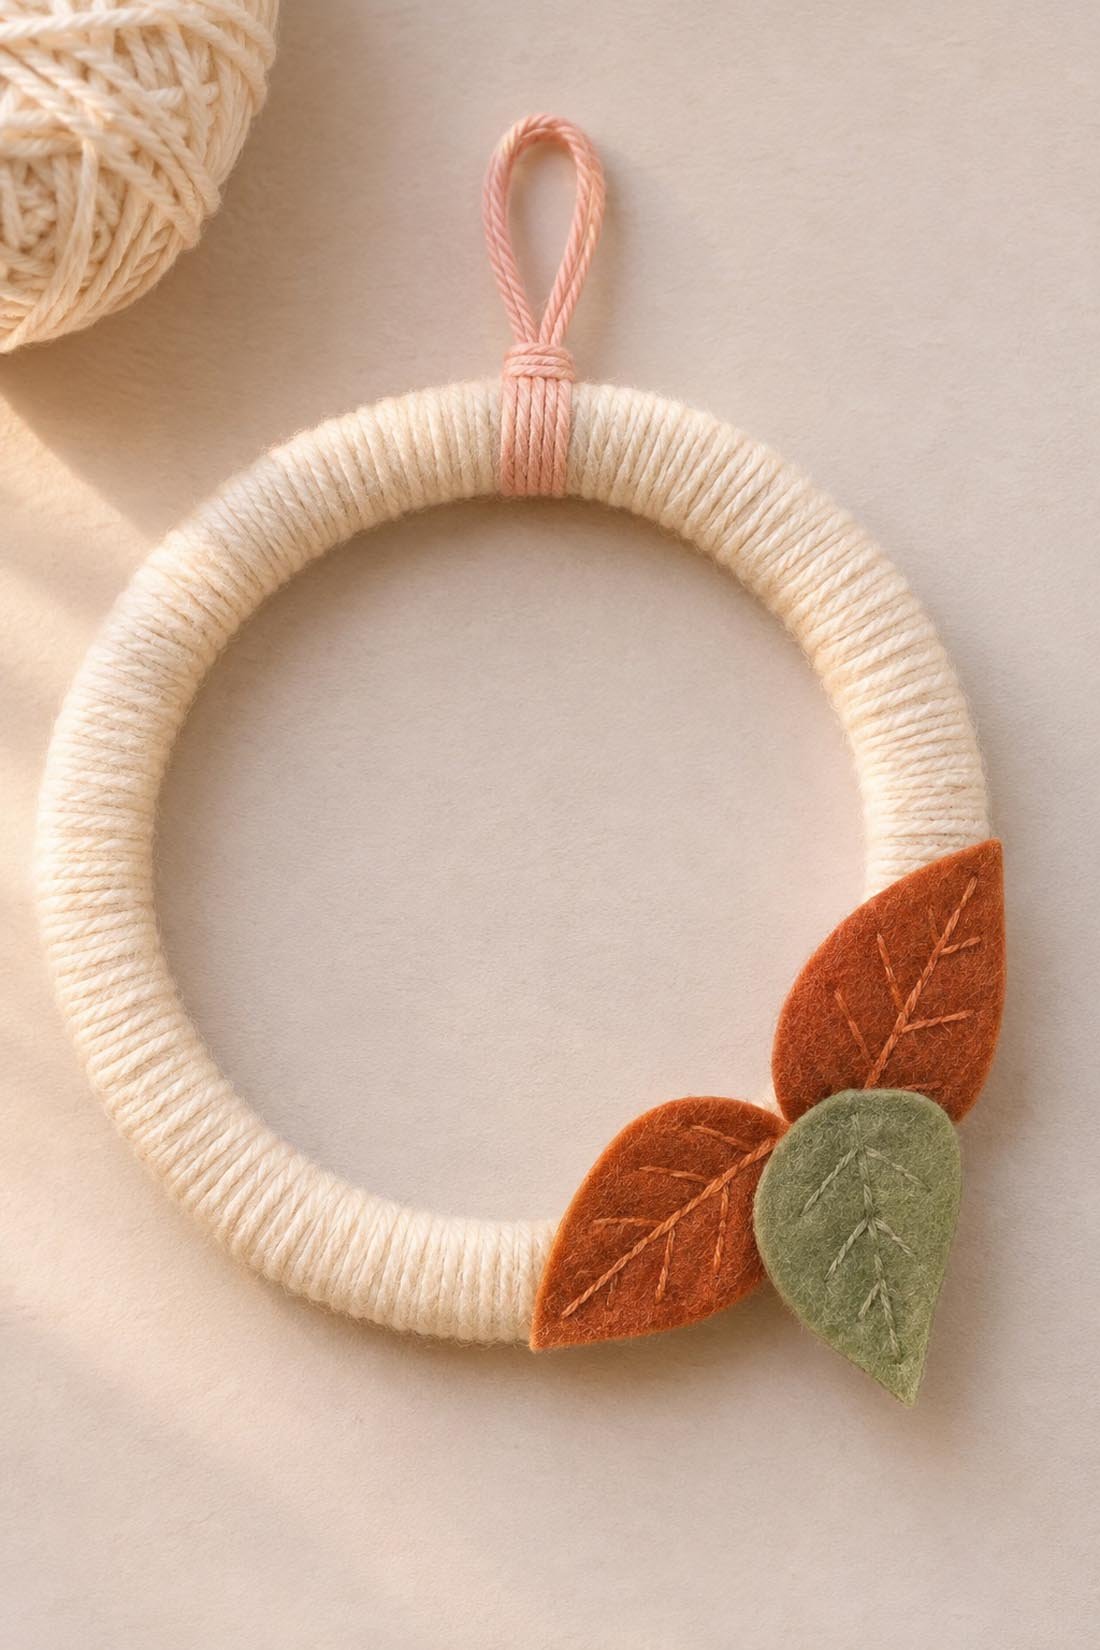
A six-inch embroidery hoop, cream yarn, felt scraps, fabric glue, and a short ribbon or cotton cord make a small wreath for an indoor hook. Use the outer hoop as your base. Keep its screw at the top so you can tuck it behind the hanging ribbon.
Tie the yarn around the hoop near the screw, leaving a short tail. Wrap the yarn around the ring in close rows. Move the yarn ball through the middle each time and nudge the wraps together as you go. Keep the tension even so the base stays covered.
When you reach the starting point, tie the yarn ends together at the back. Secure the knot with a small amount of glue. Add a cluster of three felt leaves at the lower right, overlapping their stems. Stitch veins on them first if you want to repeat the napkin-tie detail. The open center keeps the little wreath light enough for a small display spot.
Let the glue dry, then tie a ribbon or cord loop at the top. Hang it on a hook rated for its weight and your surface. If you're renting, check which hooks your lease allows. This project also uses the felt scraps left from the napkin ties, which makes choosing the colors rather convenient.
6. Stitch a pair of felt coasters
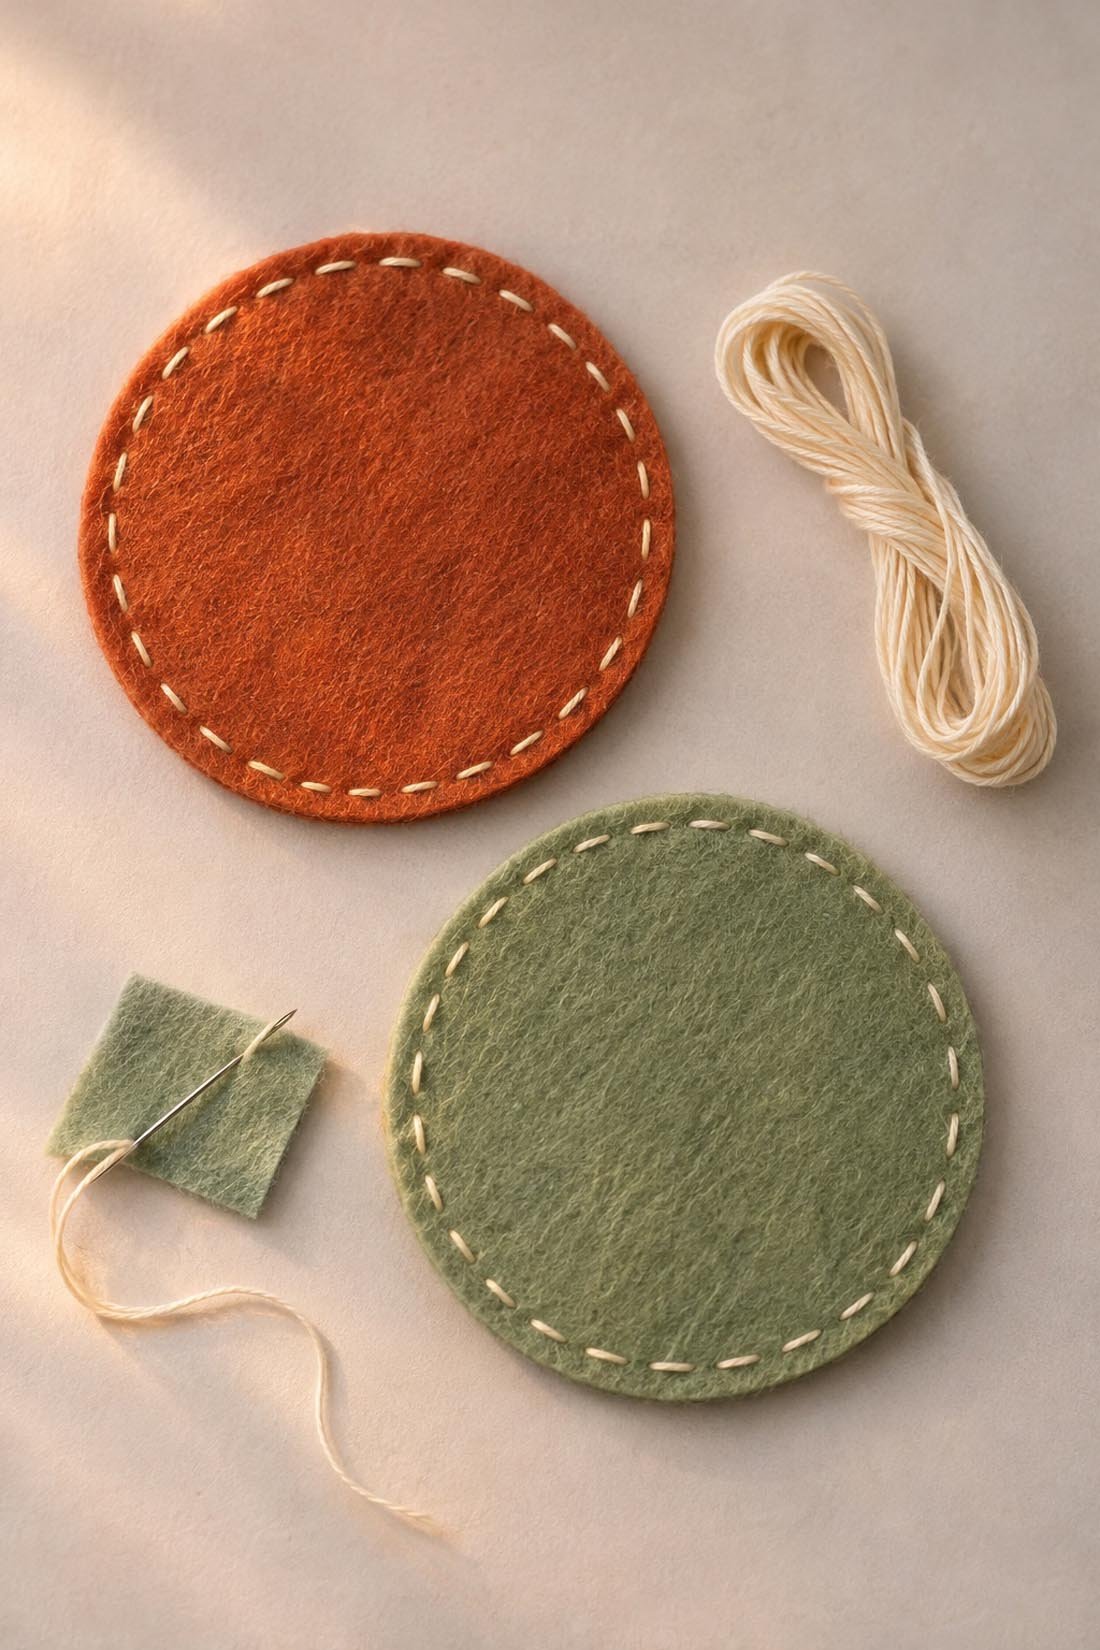
Use two layers of felt for each coaster, embroidery floss, a needle, and scissors. Trace a circle about four inches across onto scrap paper, then use it to cut matching felt circles. Rust with cream thread and sage with cream thread make a coordinated pair.
Stack two felt circles and hold the edges together. Cut a manageable length of thread, knot one end, and hide the knot between the layers. Bring the needle up near the edge. Sew a running stitch through both layers, moving down and up in short, evenly spaced steps around the circle.
Keep the thread snug enough to join the layers while letting the coaster lie flat. If the edge starts to pucker, loosen the last few stitches. Finish with a small knot tucked between the layers and trim the thread. Repeat for the second coaster.
DMC's stitch guide shows stitch paths if you'd like a visual reference or want to try a blanket-stitched edge later. Use the running stitch for the dotted border shown here.
Test a finished coaster under your usual mug before using it on a valued surface. Felt may let moisture through. These little rounds are for cups, and don't replace a heat-rated trivet under a hot serving dish.
7. Stamp leaf-pattern gift bags
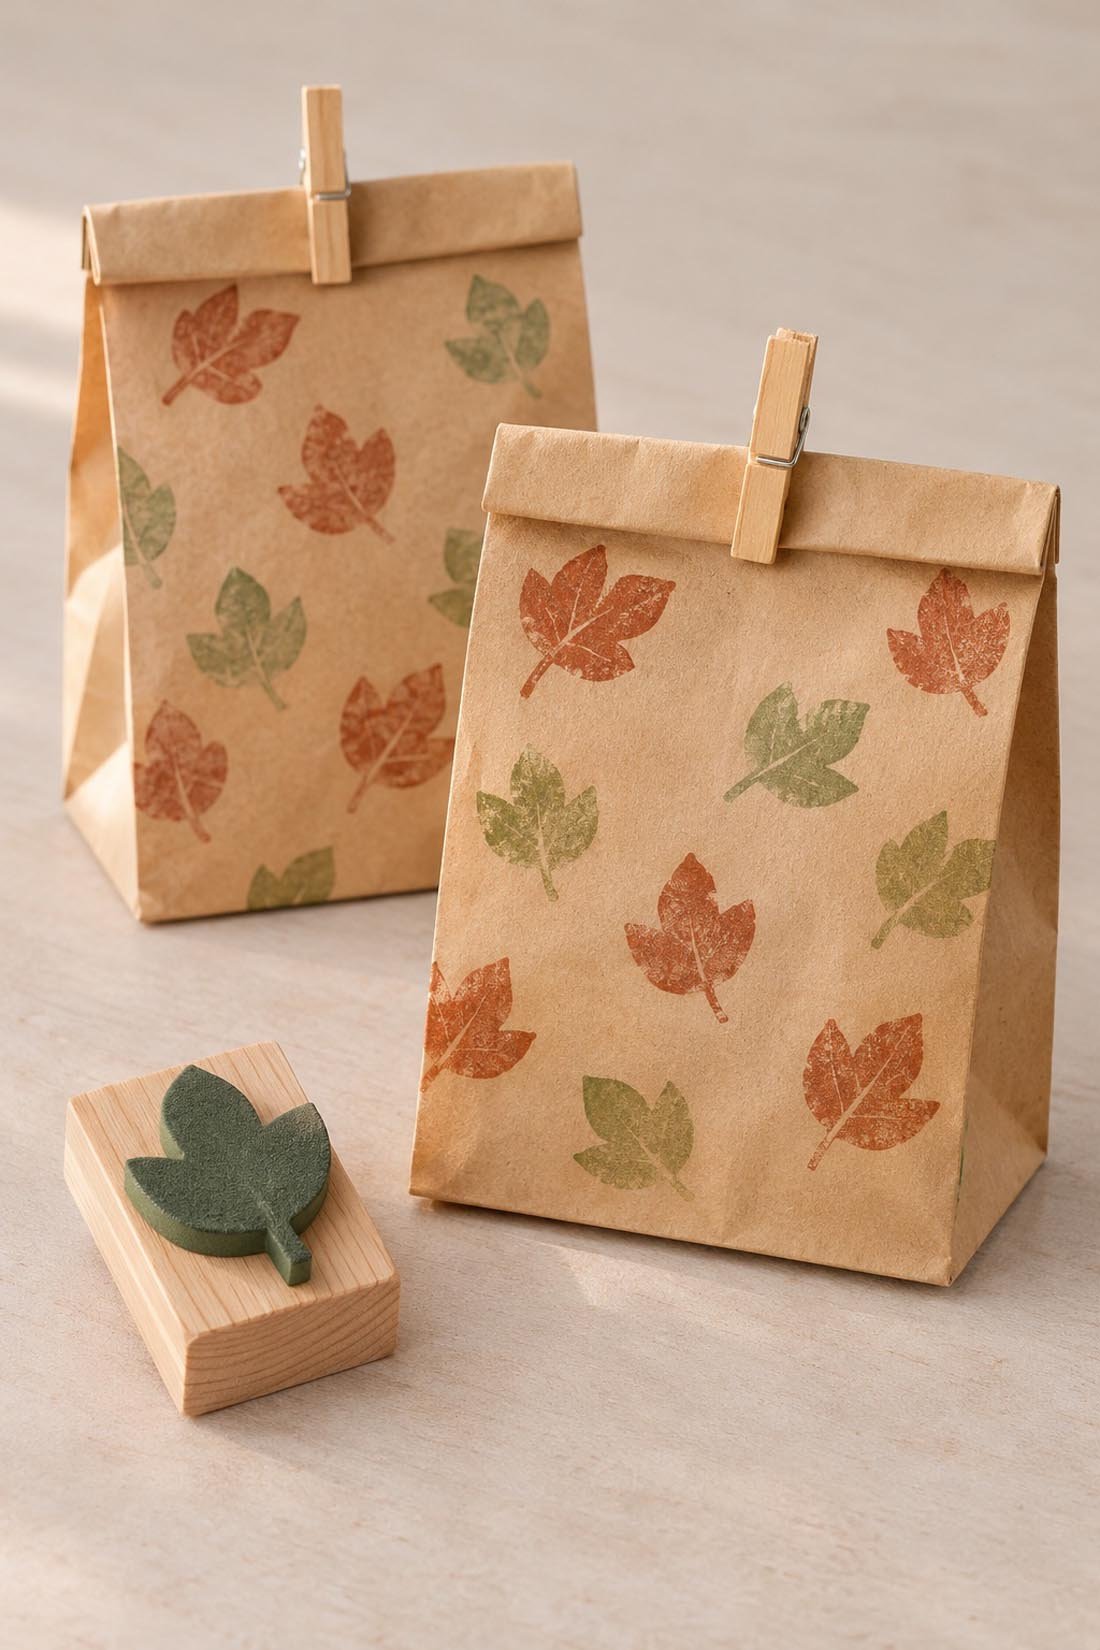
Use small kraft gift bags, adhesive craft foam, a small wood block, a washable craft ink pad, and scrap paper. Draw a leaf on the foam and cut it out. A pointed oval or a lobed shape both work. Press fine vein lines into the foam with a blunt tool if you want pale lines in the print. Stick it firmly onto the block, leaving enough bare wood to hold.
Open a bag and slide a piece of scrap cardboard inside so you have a flat stamping surface. Press the leaf stamp into the ink, then test it on scrap paper. Aim for a thin, even coat. A heavy layer can fill the edges and blur the shape.
Stamp a loose pattern across the bag, leaving space between leaves. Let one color dry before adding another. Turn the block slightly for each print so the leaves feel scattered. Remove the cardboard once the ink is dry, then open the base and check that the bag stands.
Fold the top down and close it with a small wooden peg. Slip a dry coaster or another small gift inside. For baked goods, use a separate food-safe liner or sealed food container. Keep the craft ink away from anything your friends will eat.
Set up a Thanksgiving craft night
Choose the project before you buy supplies, then ask each friend which color they'd like. Cut spare leaf templates and test the glue or paint on an offcut. Keep a box lid ready for each person's finished work, especially anything that needs to travel home flat.
Leave clay pieces with the host until they're dry enough to move. For painted pumpkins and glued felt, check the supply labels before packing them. Put your finished coaster by your usual mug, hang the garland where you'll see it, or save a little stamped bag for the friend hosting dinner.
